
The sun is beginning to linger a little longer, the garden is starting to burst with color, and the farmer’s market is beginning to overflow with colorful produce. That means canning season is right around the corner!
When I started growing my own garden and preserving the harvests, I had a large learning curve. I needed to gather the supplies I would need and the list was daunting. What items were truly essential? What was the difference between a water bath canner and pressure canner? Did I need both?
With canning season right around the corner, it is the perfect time to answer these questions and gather the supplies. While some of these items might already be in your kitchen (or you can make something you have already work as an alternative), there might be some items that need to be purchased.
Whether you’re a seasoned canner or just dipping your toes into the world of preserving, I’m here to walk you through everything you need to get started. Let’s roll up our sleeves and dive into the essentials for a successful canning season!
Why Can Your Own Food?
Before we get to the nitty-gritty, let’s chat about why canning is so special. There’s something magical about capturing the flavors of summer in a jar—think sweet strawberry jam on toast in January or tangy pickles that crunch just right.
Canning lets you savor the season year-round, reduce food waste, and control exactly what goes into your food (no weird preservatives here!). Plus, it’s a budget-friendly way to stock your pantry and makes for heartfelt, homemade gifts. Ready to fill those jars? Let’s talk about what you’ll need.
Canning Tools for the Beginner
Canning Jars
Look for Mason or Ball jars with no cracks or chips. I love quart jars for things like pickles, pasta sauce, green beans, peaches, and pears. Pint jars are ideal for things like jams, salsa, and hot sauce, but half-pint jars are perfect for gifting.
Canning jars are an investment and can be used year after year. They can often be found at large grocery stores like Walmart or sometimes even small, local hardware stores. Looking for canning jars on a budget? Check local thrift stores and garage sales. If you can’t find jars locally, they can be ordered online from Amazon or other sellers.
Canning Lids and Bands
Stock up on regular and wide-mouth lids to match your jars. Lids can be found at the same locations as jars, or one of my favorite places to buy canning lids is For Jars. Bands can be reused year after year as long as they are not damaged.

Canner(s)
A water bath canner with a rack is your go-to for high-acid foods like fruits, jams, and pickles. It’s affordable and easy to use.
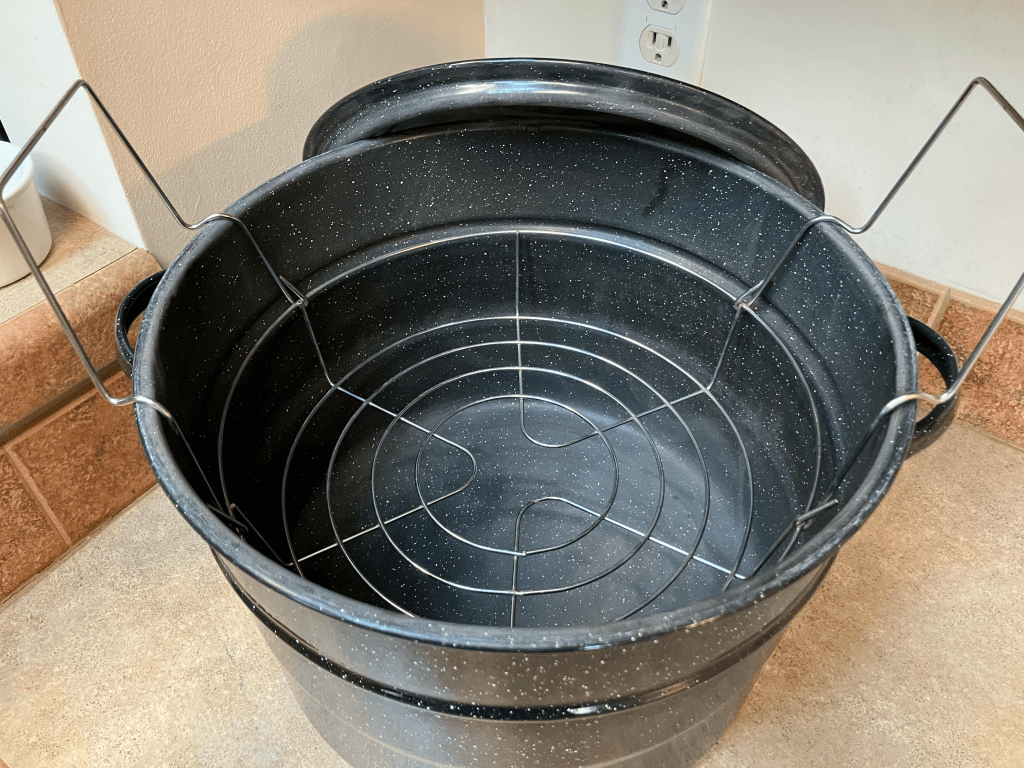
If you do not have a water bath canner but still want to water bath can, you can use a large stockpot, just make sure that the jars can be covered with water. It is also a good idea to place something in the bottom to keep the jars from directly sitting on the bottom of the stockpot. I like to place a canning lid upside down if I don’t have a rack that fits the bottom of the pot.
A pressure canner is perfect for low-acid foods like green beans or soups, and is a must to kill harmful bacteria in low-acid foods. Pressure canners come with options for a weighted or dial gauge. It’s an investment, but worth it for versatility.
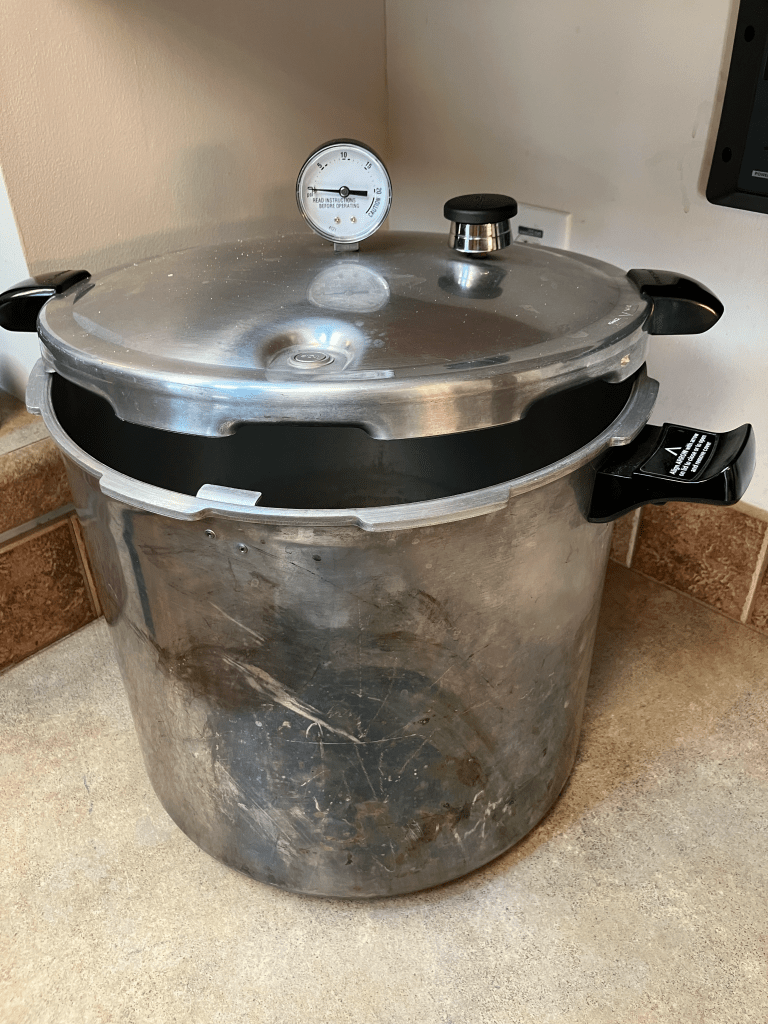
If you plan to pressure can, you can make your pressure canner double as a water bath canner by leaving the lid off. This is one of my favorite tricks when I want to process more jars at one time than will fit in my water bath canner. I quickly go from one water bath canner to two!
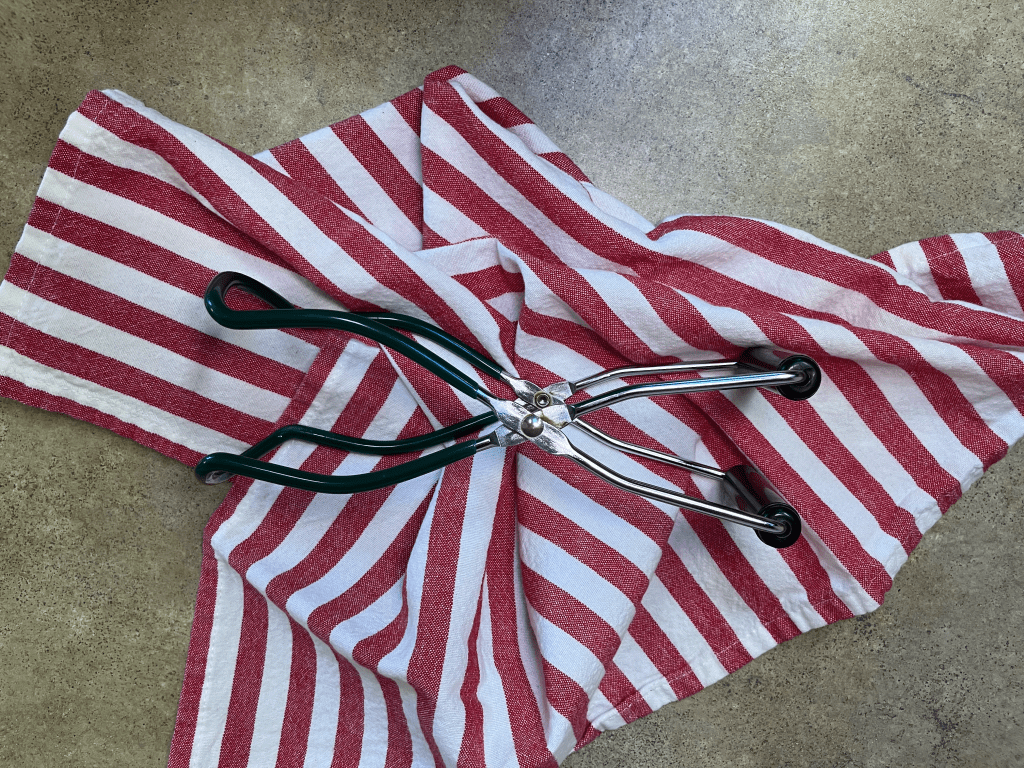
Jar Lifter
Trust me, you don’t want to fish hot jars out of boiling water with regular kitchen tongs. A jar lifter is a specialized set of tongs for handling hot jars to keep your hands safe.
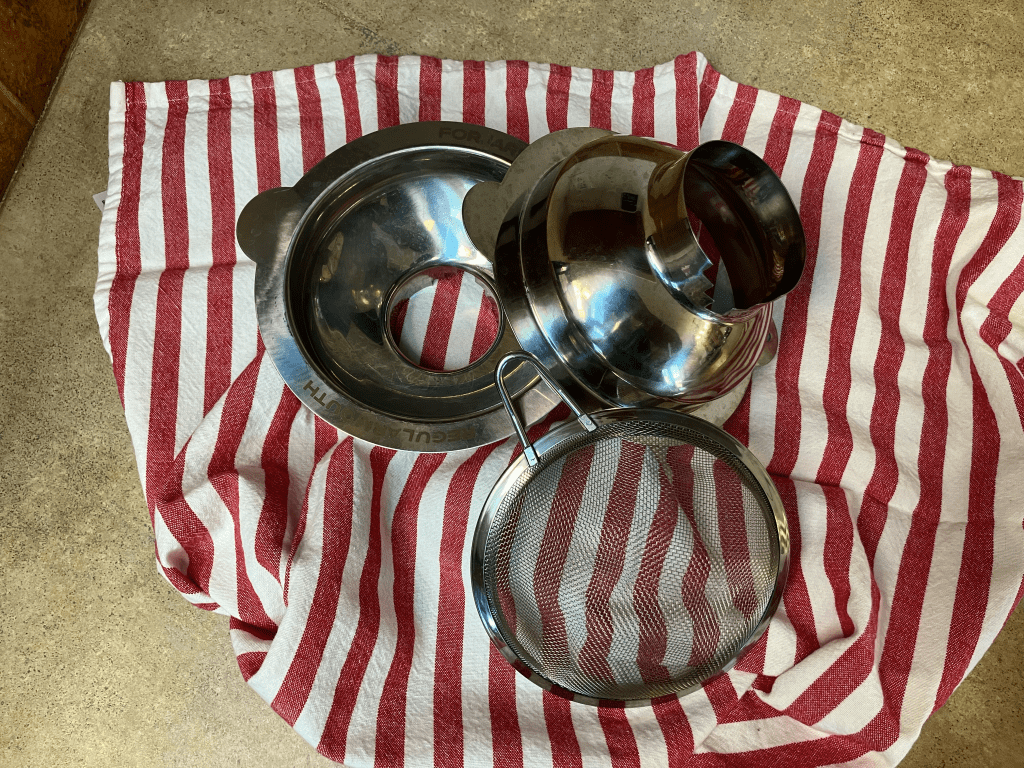
Canning Funnel
A funnel with a wide mouth makes filling jars mess-free. I love this set of canning funnels from For Jars. The set comes with a funnel for wide-mouth jars, a funnel for regular mouth jars, and a mesh strainer that sits right inside both of the funnels. These funnels are amazing because they come with headspace measurements right on the funnels!
Bubble Remover
This doesn’t have to be anything fancy. They make bubble remover tools, but I often just use a skewer. The key is to release any trapped air bubbles so that the jars will seal properly.
Headspace Tool
Often times the bubble remover tools will come with a head space measurement. The other options is For Jars canning funnels that have the headspace measurement built into the funnel!
Lid Wand
A lid wand is a magnetic tool for picking up and placing hot jar lids safely onto jars. They can be found on Amazon.
General Kitchen Tools for Canning
Hot Pads
A good pair of hot pads is essential for handling hot sauce pans and stock pots throughout the canning process.
Wash Clothes and Towels
Spills happen, so keep plenty of wash clothes and towels at the ready. I like to use a wash cloth to wipe the tops of each jar before placing the lid to ensure that no product is on the rim which will prevent a proper seal. A large bath towel doubled over works well for placing jars on the counter to cool.
Timer
A timer is a must have for ensuring safety when canning. Your phone will work for this if you don’t want to buy a kitchen timer, but I love the coziness a kitchen timer, like this one from For Jars, brings to the kitchen.
Sauce Pan and Stock Pot
A sauce pan and stock pot are essential for heating the product and preparing it to go into jars. The sauce pan can also be very handy for heating the canning lids before placing them on jars.
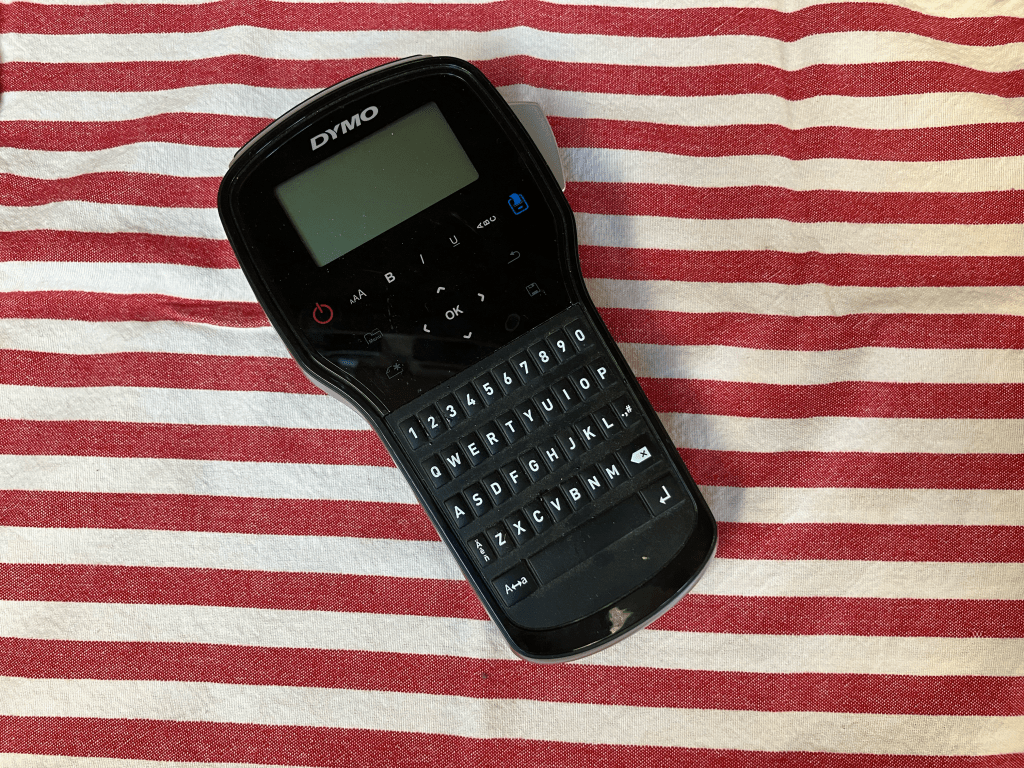
Labels
You can use a fancy label maker or you can just use some painters tape and a sharpie to label what is in each jar and when it was canned.
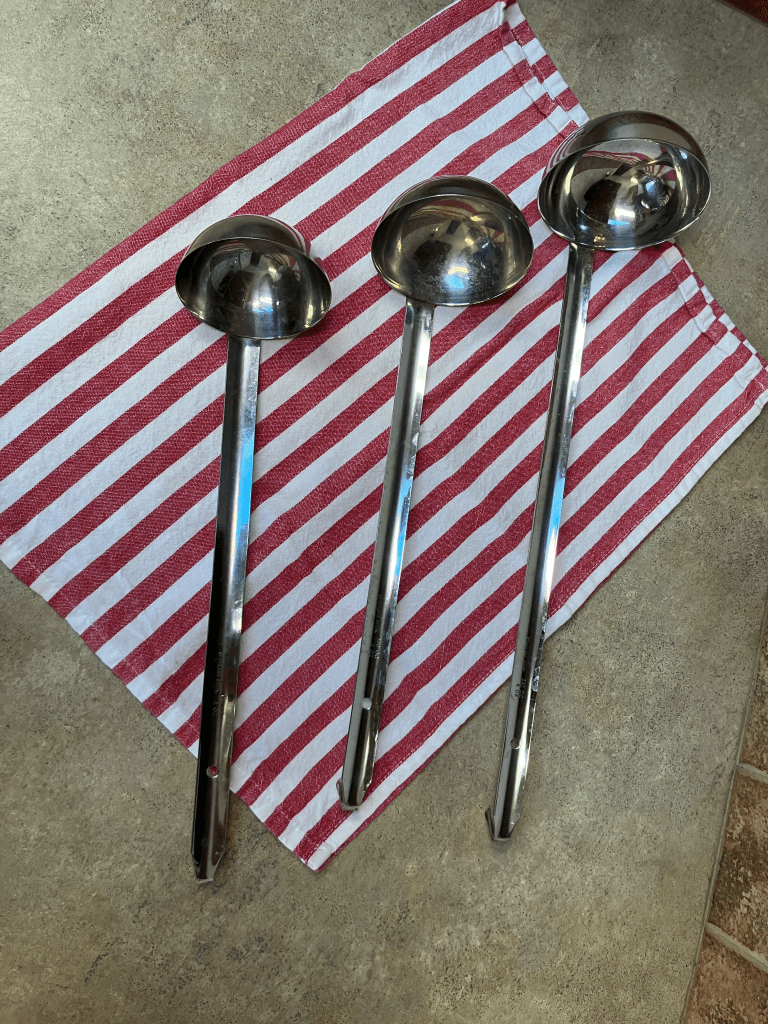
Ladle
A ladle is a great tool for getting the product from the stock pot into the jars. I love these stainless steal ones!
Tip: Check your local thrift stores for jars and tools, but inspect them carefully to be sure that they are not damaged. Always have your pressure canner gauge tested before using it each season whether it is new to your or not.
Ingredients – Quality Matters
Fresh Produce
Pick fruits and veggies at their ripest—think firm tomatoes, juicy berries, or crisp cucumbers. Overripe or bruised produce can lead to mushy results or spoilage. Hit up your garden, farmer’s market, or local orchard for the best produce.
Pectin
Pectin helps your preserves set. Liquid or powdered pectin works great, but follow the recipe exactly—different types aren’t interchangeable. Some fruits, like apples, have natural pectin, so you might not need extra.
Sugar and Acid
Sugar preserves flavor and texture in jams, while acid (like lemon juice or vinegar) keeps things safe by lowering pH. Don’t skimp on these unless your recipe is designed for low-sugar canning.
Spices and Herbs
Fresh dill for pickles or cinnamon for applesauce adds some extra flavor. It is best to use fresh herbs when possible.
Best Practices for Canning Tools
- Check equipment for damage before starting. Inspect jars to be sure that they do not have cracks or chips. Blemishes around the lip of the jar can prevent the jars from sealing properly. The gauge on a pressure canner should be checked each year before use to be sure that it is still calibrated.
- Sterilize jars and keep them hot until filled. You want the jars, lids, product, and canner water to all be about the same temperature to prevent jars from cracking and breaking from dramatic temperature changes.
- For beginners, start with water bath canning for simpler, high-acid recipes like jams or pickles.
Your Canning Season Game Plan
Ready to get started? Here’s a quick plan to kick off your canning season:
- Inventory Check: Dig out your supplies and replace any worn-out lids or rusty bands. Be sure to have your pressure gauge checked if you will be pressure canning.
- Pick Your Recipes: Choose 2–3 beginner-friendly recipes, like strawberry jam or dill pickles, to build confidence.
- Shop Smart: Hit the farmer’s market early for the freshest produce, and grab extra lids just in case.
- Set a Canning Day: Block off a morning or afternoon, gather your tools, and crank up that playlist.
- Share the Love: Gift a jar to a neighbor or swap with a friend. Nothing beats the joy of sharing your hard work!
Frequently Asked Questions
Do I need a water bath canner and a pressure canner?
No! If do not plan to can anything that is low-acid, then a water bath canner will work just fine. However, if you plan to pressure can you will need a pressure canner, but you can make your pressure canner double as a water bath canner by leaving the lid off so you don’t have to buy both.
Where do I find canning recipes?
Canning recipes can be find online pretty easily. For tested recipes, check out places like the USDA or Ball. I like to use Amish recipes when I can find them.

Where do I find canning supplies?
Canning supplies can be found online at places like For Jars or Amazon. Sometimes local grocery stores and hardware stores will also have canning supplies.
Where do I get my pressure canner gauge checked?
Often times the local extension office can check your pressure canner gauge for you. If you aren’t sure, call them and ask. When you go, you don’t have to take your whole pressure canner with you. All they will need is the gauge, so you can remove it from the lid of the pressure canner.
Canning season is more than just filling jars—it’s about preserving memories, flavors, and a little bit of summer’s magic. With the right tools, fresh ingredients, and a sprinkle of patience, you’ll be popping open jars of homemade goodness all year long. So, grab your apron, call a friend to join the fun, and let’s make this canning season the best yet. What’s first on your canning list? Drop a comment below or tag me on social media (@coras_cottage on Instagram)—I can’t wait to see your creations!
Happy canning!

Leave a comment