
If you’ve ever scrolled through social media and felt intimidated by the idea of making sourdough bread, you’re not alone. The endless tutorials about feeding starters and perfect timing can make it seem like you need a PhD in baking. But here’s the good news: sourdough doesn’t have to be complicated.
I’ll walk you through a beginner-friendly, flexible approach to making a delicious artisan loaf that fits into even the busiest schedule. Whether you’re a working parent or just dipping your toes into sourdough, this guide will show you how to make it work without stress—and with results you’ll love.
Making sourdough (and keeping a starter) are as hands on as you make it. If a sourdough starter could survive the trip out west in a covered wagon through extreme high and low temperatures … I think it can handle the modern kitchen 😉
Why You’ll Love This Recipe
Simple Enough for Beginners
One of the beauties of sourdough is that it uses simple ingredients. Flour, water, salt, and starter … which is just flour and water.
Flexible, Even for the Busiest Schedule
While you might think that sourdough is hard and inflexible, the exact opposite is true! in fact, sourdough is more forgiving than yeast bread, allowing for more wiggle room during the rising and proofing processes.
Delicious in Many Forms While Maintaining a Simple Ingredient List
This sourdough recipe is delicious and can be used in many ways. You can make a simple artisan loaf with no inclusions or add inclusions ranging from cinnamon to jalapeños and cheddar cheese. And all of them are delicious!
Keeping a Starter Without Discard
I don’t keep my starter on the counter to avoid having discard from feeding it every day. Instead, I leave my starter in the refrigerator until a couple hours before I plan to feed it. For example, if I plan to bake bread on Monday, I will remove my starter from the refrigerator on Sunday morning, feeding it on Sunday around noon, and mix the bread together in the evening.
Before placing my starter back in the refrigerator, I make sure that all the starter is pushed down off the sides of the jar and is gathered together. If I will be baking again within the next week, my next step is to simple place the jar in the refrigerator with a lid.
However, if I do not plan on baking again within the next week, I will feed the starter so that it is extra thick and add a layer of flour on top before placing the starter in the refrigerator with a lid on top.
Feeding the starter to a thicker consistency (peanut butter rather than pancake batter) helps slow fermentation in the refrigerator, keeping it healthy for longer without needing frequent feedings.
The layer of flour on top acts as a protective barrier, preventing air exposure and drying out while providing extra food for the starter to eat while “hibernating” in the refrigerator. Simply sprinkle a thin layer of flour over the surface before adding the lid.
How to Make A Sourdough Artisan Loaf
To make this recipe, you’ll need an active sourdough starter. If you don’t have one, you can make your own by mixing equal parts flour and water (e.g., 50g each) and then feeding it daily for 5–7 days until bubbly and tangy. Alternatively, ask a friend for a scoop of their starter or buy one online.
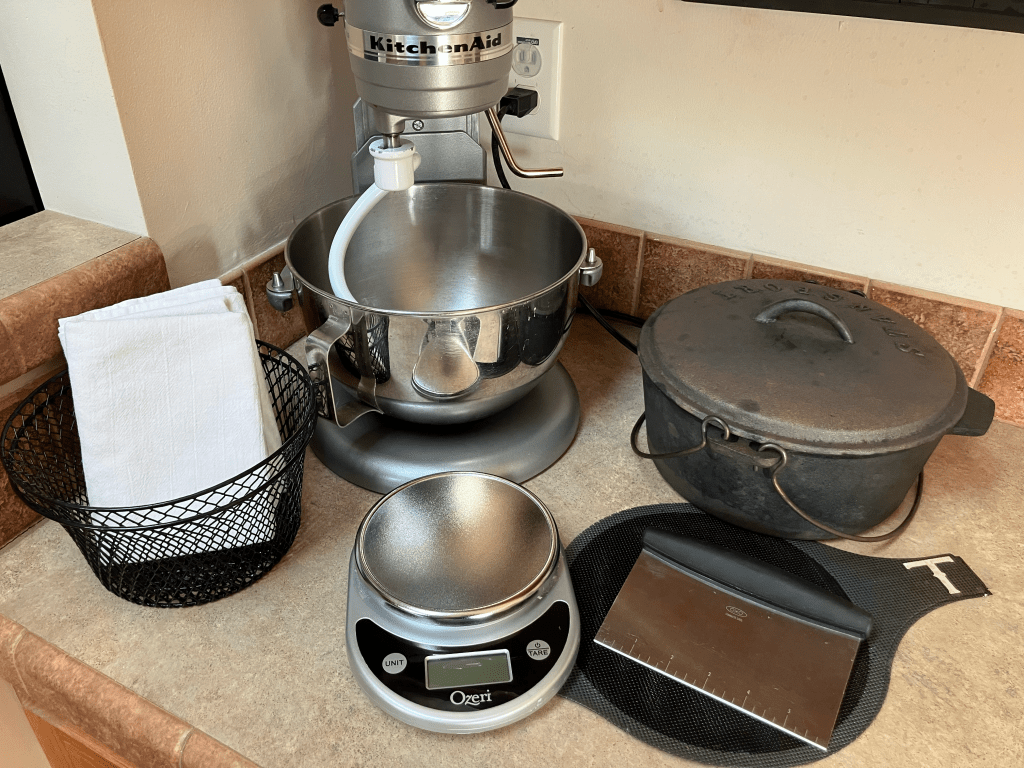
For equipment, you can get by with just a mixing bowl, measuring cups, a tea towel, and a Dutch oven. The other tools (like a banneton, stand mixer, and bench scraper) are nice but not essential—improvise with what you have!
The Tools
- Stand Mixer with Bread Hook Attachment (Optional)
- Large Mixing Bowl
- Tea Towel (or similar)
- Measuring Cups & Spoons or Kitchen Scale
- Bench Scraper
- Banneton or Small Mixing Bowl with Towel
- Parchment Paper or Bread Mats
- Dutch Oven(s)
- Cooling Rack
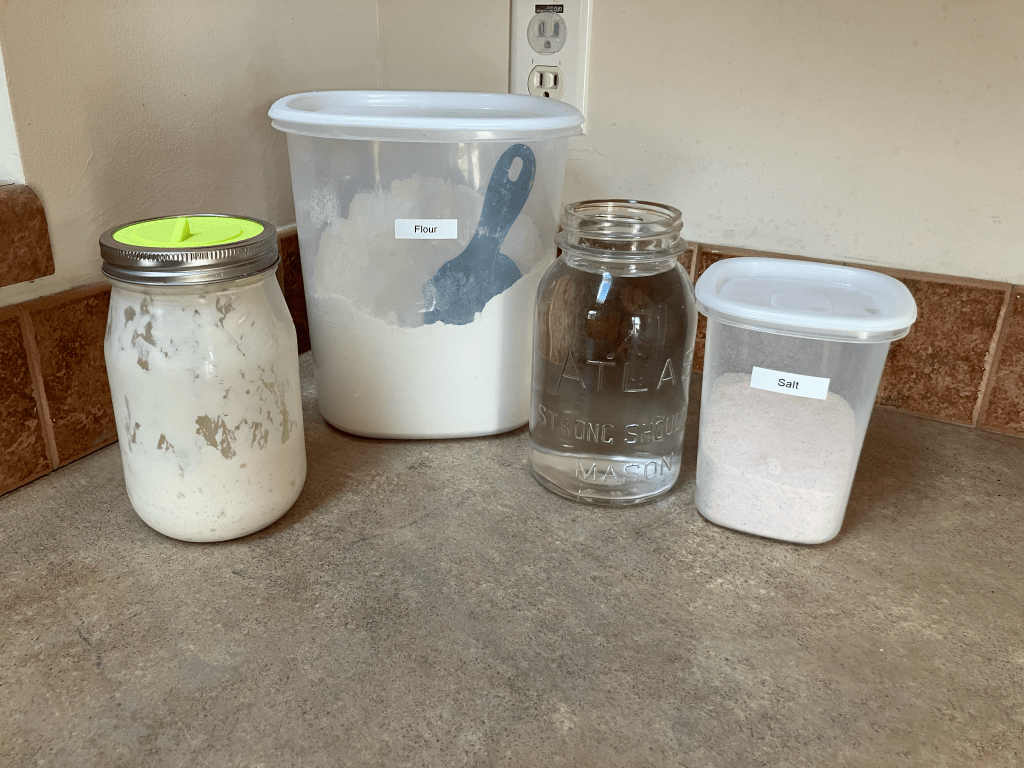
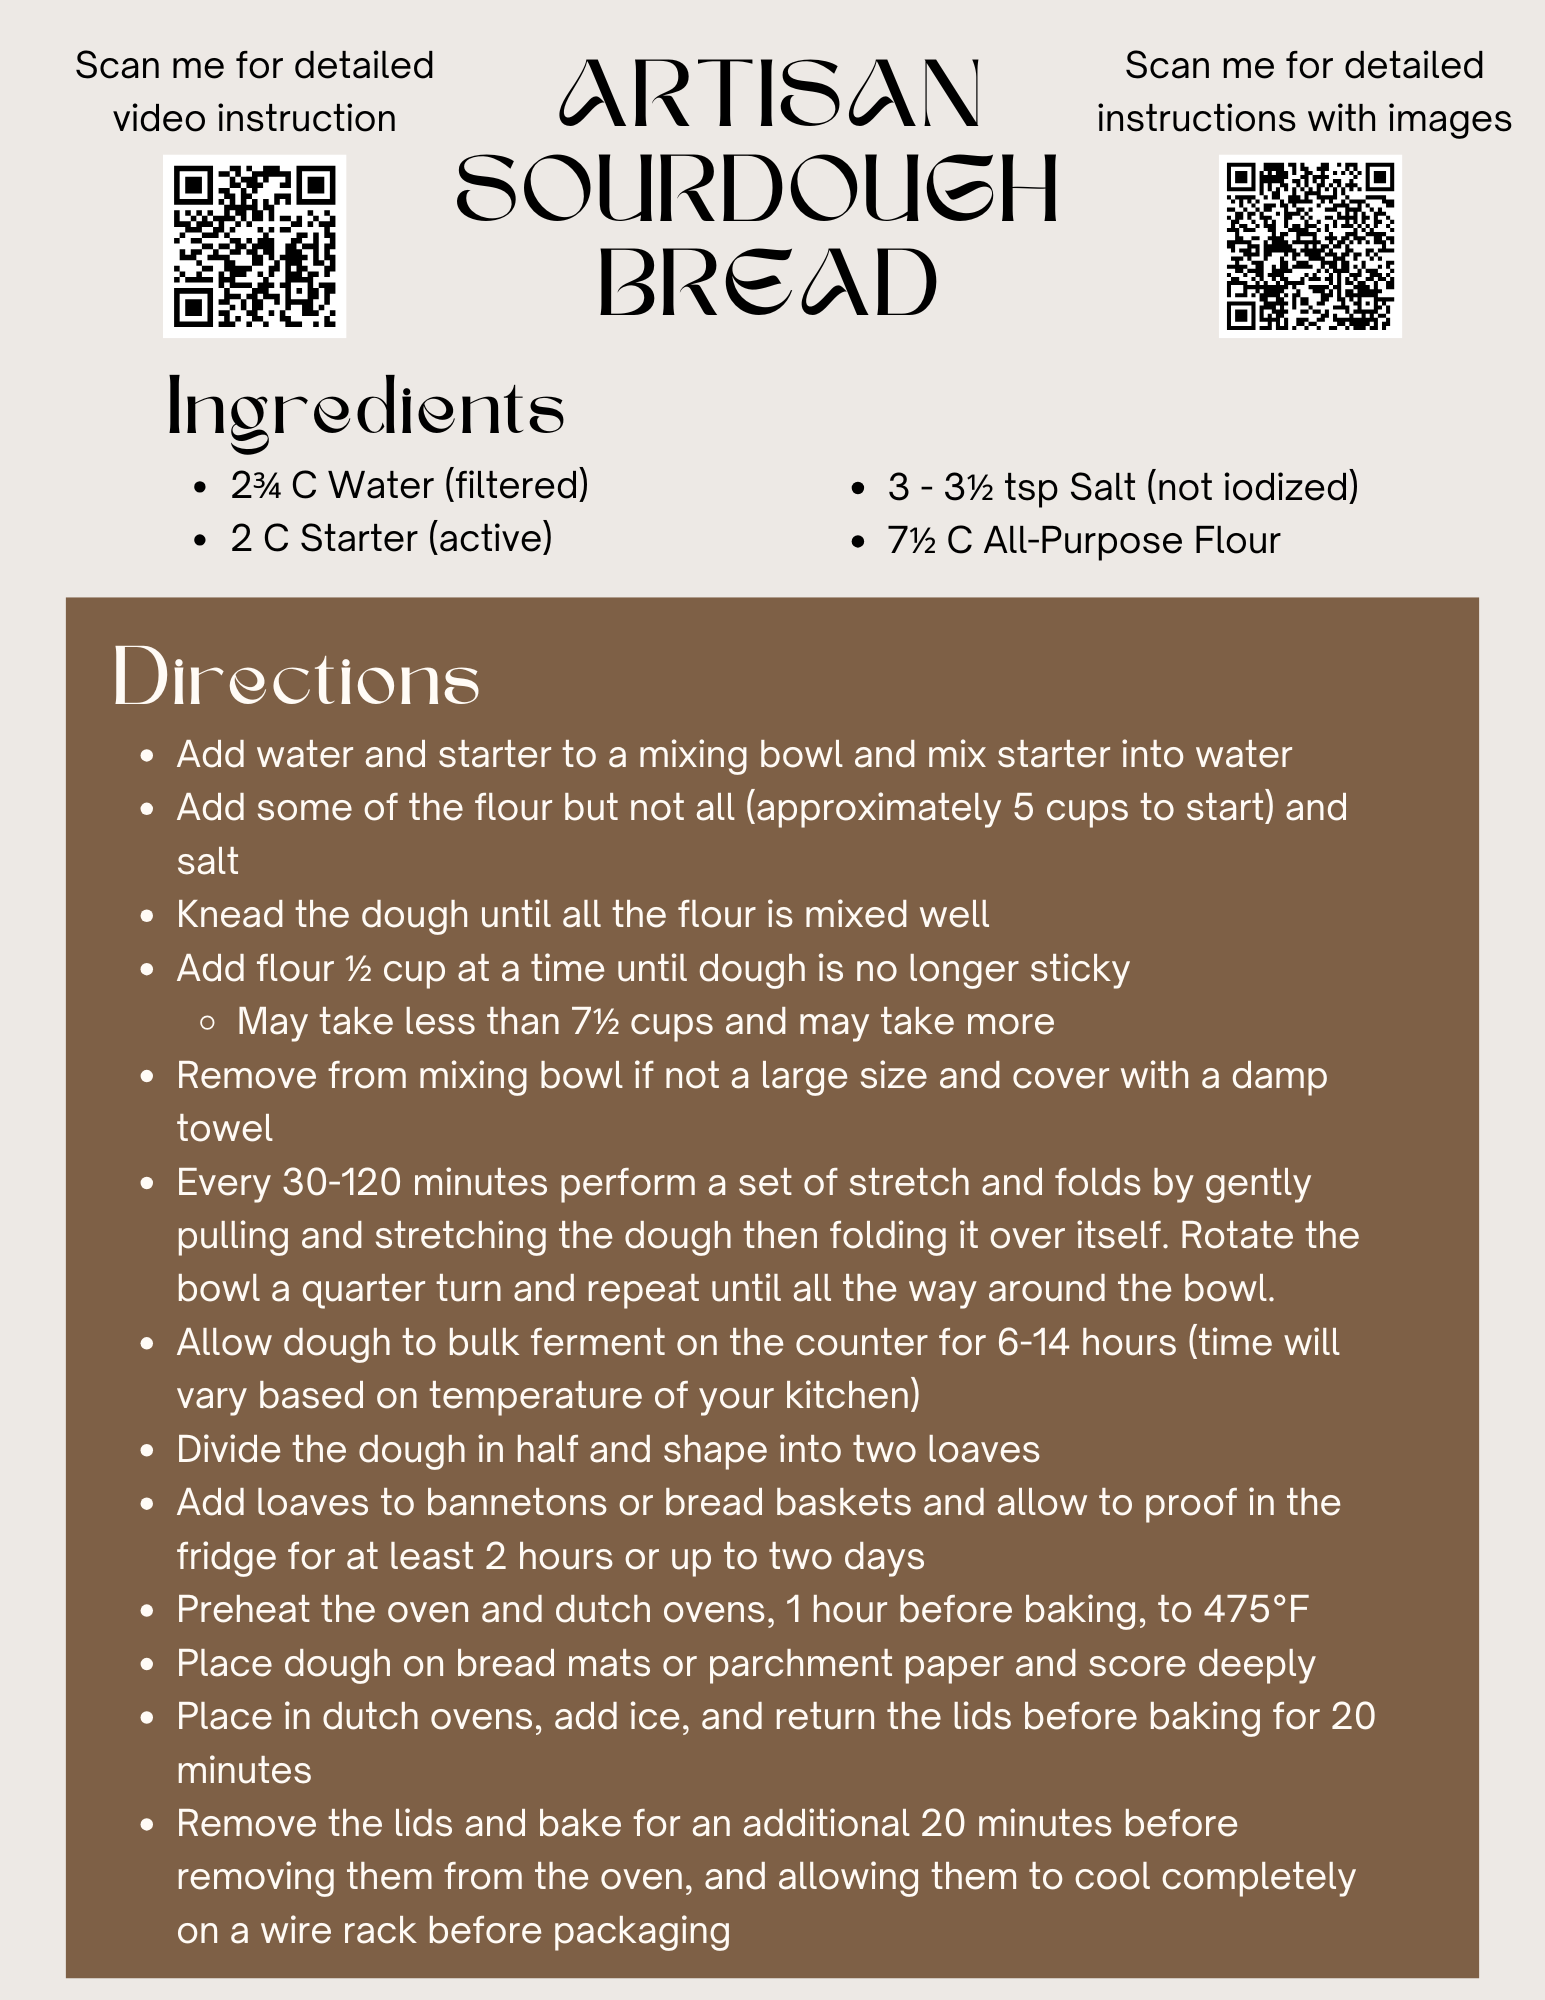
The Ingredients
- Starter – Just flour and water, your starter should be active and bubbly.
- Flour – All-purpose or bread flour is great when starting out!
- Water – Use filtered or dechlorinated water to avoid harming the starter’s microbes.
- Salt – Regular table salt or sea salt is fine. Avoid iodized salt, as it can impart a slight metallic taste. I like to use Redmond’s Real Salt.
The Steps
Step 1: Feeding Your Starter
The timing of when to feed your starter will depend on how robust your starter is and how warm your kitchen tends to be; however, as a general rule you will want to feed it 6-12 hours before you want to make bread. In my kitchen, this means that I am feeding my starter around noon if I want to make bread dough in the evening to bulk ferment overnight.
To feed your starter, you want equal parts of flour, water, and starter. For example, if you have 50g of starter, add 50g of flour, and 50g of water. When I first started out, I would get my kitchen scale out and measure everything exactly, transferring my starter into a new jar each time I fed it … this is not necessary!
You can certainly use a scale if it makes you more comfortable, but to feed my starter now I add some flour and water until it is the consistence I want it to be. I am looking for a thick pancake batter.
Consistency of the starter you like to work with can vary. Some people like the results they get with a thicker starter, other people prefer the results from a thinner starter. It will depend on your preferences and kitchen. The moral of the story here is that sourdough is forgiving! So even if you are unsure about your starters consistency, as long as it is bubbly give it a try! You might love the results you get.
Step 2: Determining If Your Starter is Ready
When your starter has reached its peak or has risen to its maximum point, you are ready to make dough! As I mentioned earlier, in my kitchen this is between 6 and 8 hours usually, but in our previous home it took closer to 12 hours. The temperature of your kitchen among other factors will make this timing vary.
When I first started out, I was very worried with whether my starter was exactly at its peak. However, over time I have gotten more comfortable with simply making sure it is just active and bubbly by looking for bubbles on the surface and sides of the starter with a pleasantly tangy smell. I cannot really tell a difference in my results and it is much less stressful! This is another area where sourdough can be so forgiving.
If you need to run out to do errands and your starter is bubbly but it hasn’t been the usual amount of time? Use it! You will likely get a loaf that turns out just fine!
Step 3: Making Bread Dough
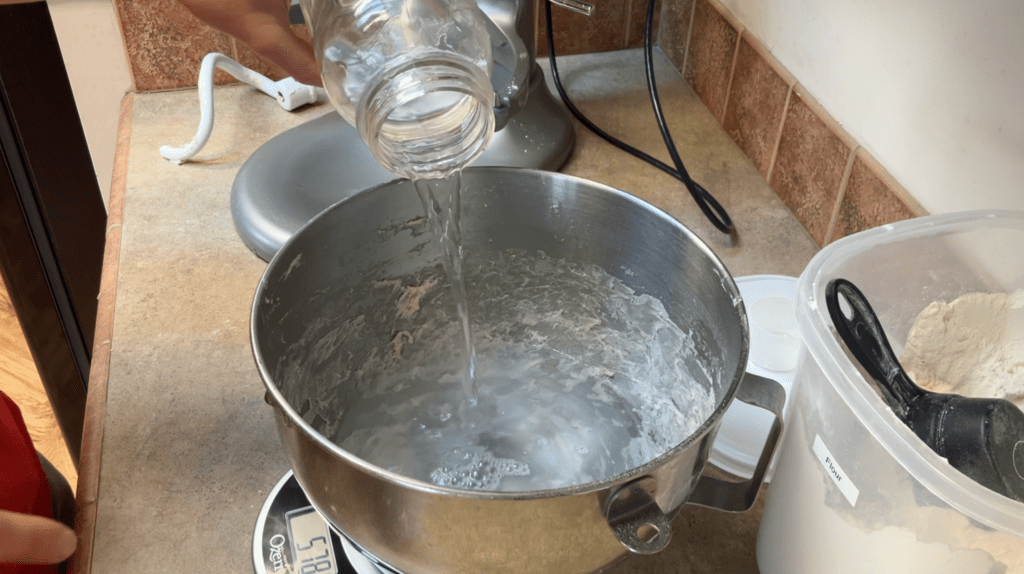
When you have determined that your starter is active and bubbly. Add the water to your mixing bowl followed by the starter. You are looking for your starter to float. If you are worried your starter will not float, only add a small amount at first.
If it doesn’t, this isn’t necessarily the end of the world, but your loaf is likely to be heavier without as much rise. I have made bread without a floaty starter before and it has been edible just more dense then my family prefers.
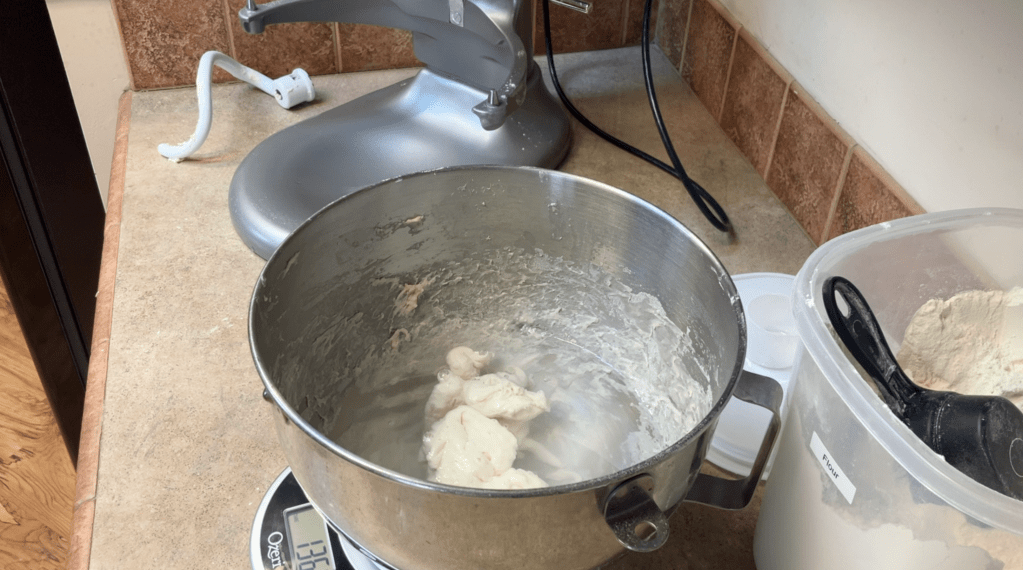
Using your hands mix the starter into the water before adding some of the flour (I like to add about 3/4 of the flour) and salt. Mix all the ingredients together using a dough hook or your hands until it begins to pull together.
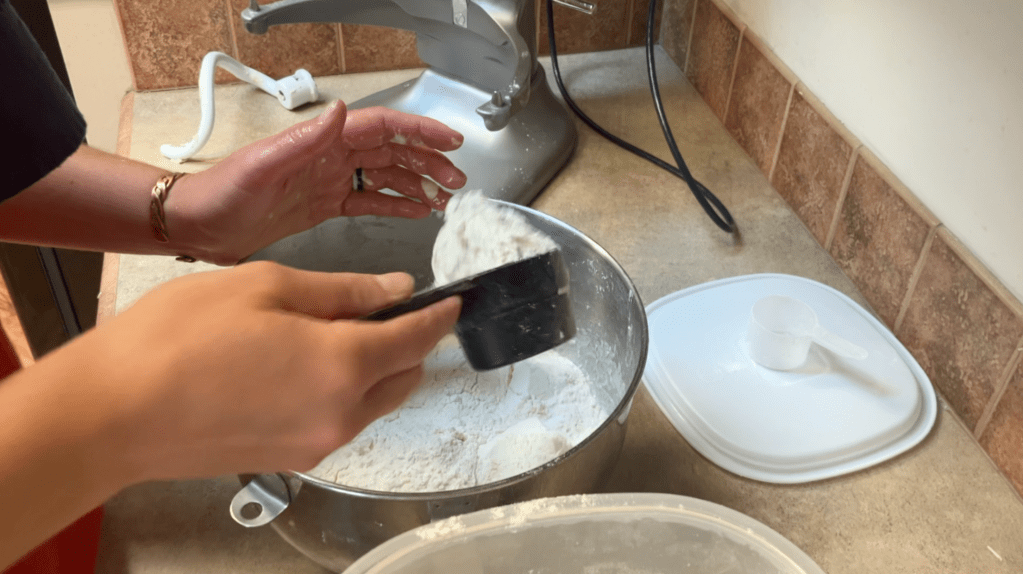
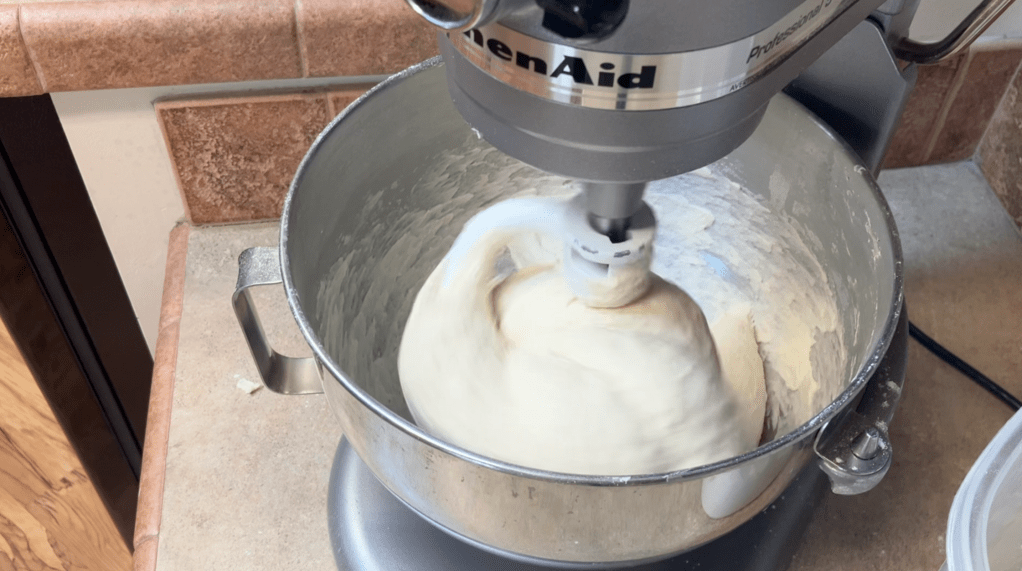
Add the rest of the flour in small increments until the dough no longer clings to the sides of the bowl.
If you are using a stand mixer, I like to remove the dough from the mixer bowl into a large mixing bowl before covering it with a damp tea towel and allowing it to rest for 30-60 minutes.
Step 4: Stretch and Fold
After the dough has rested for 30-60 minutes, remove the damp towel and perform a set of stretch and folds.
To perform a stretch and fold, gently grab one side of the dough and stretch it up before folding it over. Turn the bowl a quarter turn and repeat the process until you have made it all the way around. Replace the damp towel over the bowl and allow the dough to rest for another 30-60 minutes.

Perform 3-4 sets of stretch and folds over the next 2-4 hours.
Step 5: The Bulk Ferment
After the last set of stretch and folds, cover your bowl with a damp towel (if you are using a tea towel or other thin towel, I recommend two) and allow the dough to bulk ferment for 8-12 hours.
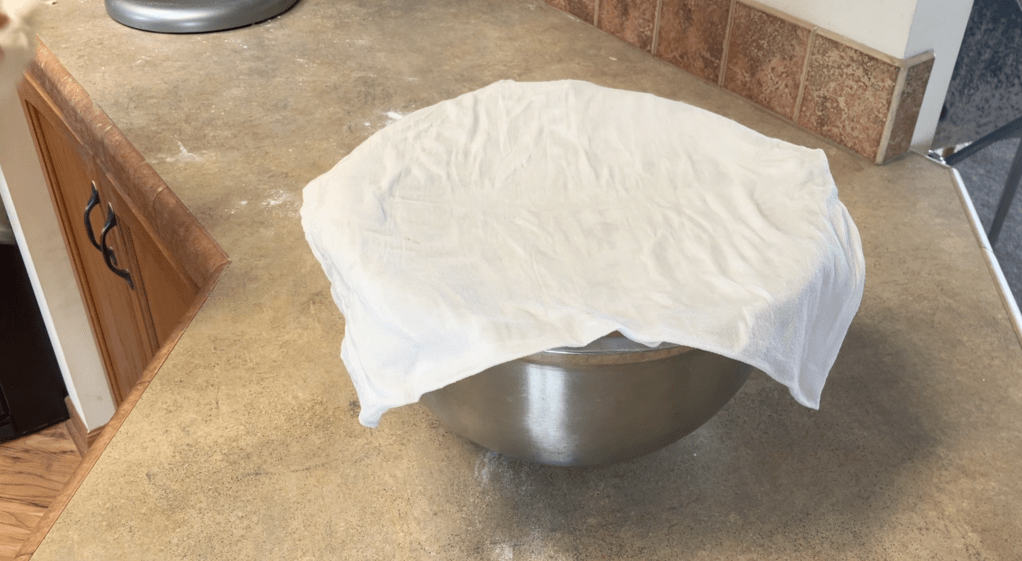
Just like with the starter becoming active and bubbly, the exact amount of time it takes the dough to bulk ferment will depend on your kitchen. There have been times when my kitchen is pretty cold so it takes as long as 15 hours for the bulk ferment.
However, be careful not to let the dough over-ferment. This will cause the bread to become a sloppy mess that is not only difficult to shape, but will not hold a loaf shape when baked, becoming more like a pancake.
If the dough does over-ferment, you can make bread pudding, croutons, or stuffing so don’t throw it out because it is not a total loss.
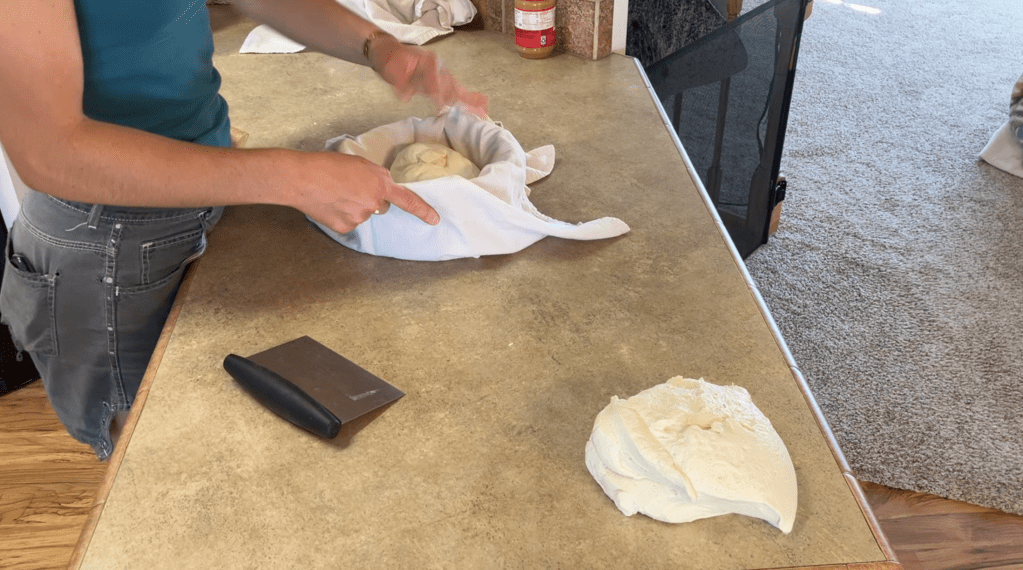
Step 6: Shaping Loaves
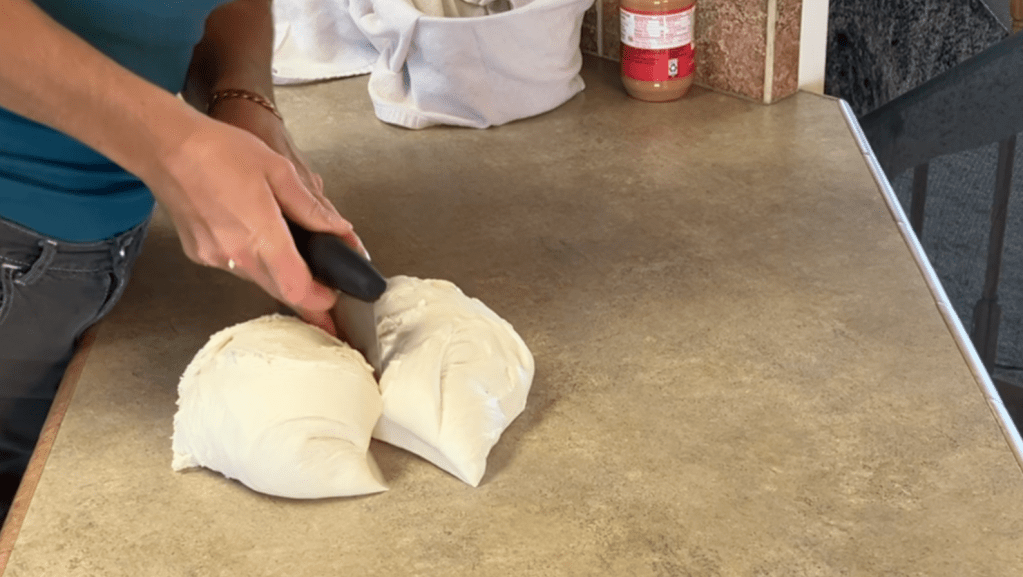
After your dough has completed the bulk ferment, it is time to shape your loaves. Divide the dough into two equal parts using a bench scraper. If you do not have a bench scraper you could use a knife, just be careful not to cut yourself or the counter.
Set aside one portion of dough and move the other to the middle of the counter. Gently stretch the dough in all directions. It should pass the windowpane test. The windowpane test is when you can stretch the dough until you can “see” through it without the dough breaking.
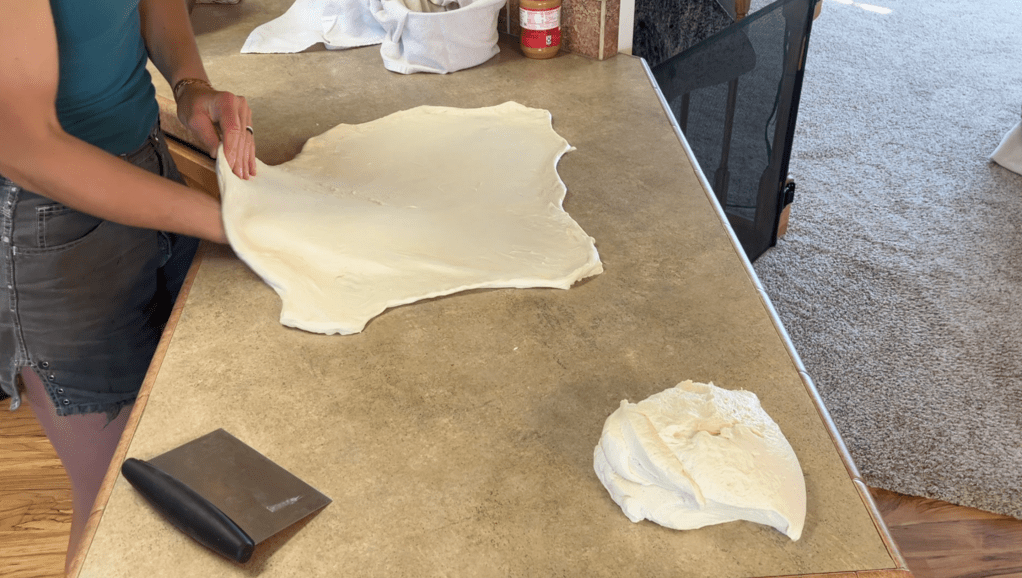
When your dough can pass the window pane test this means that enough gluten has developed to allow for a good rise.
Take one side of the dough and fold it over so that you will be able to fold the dough into thirds. Repeat the process on the other side so that both edges are folded over the middle creating a long strip with three layers.
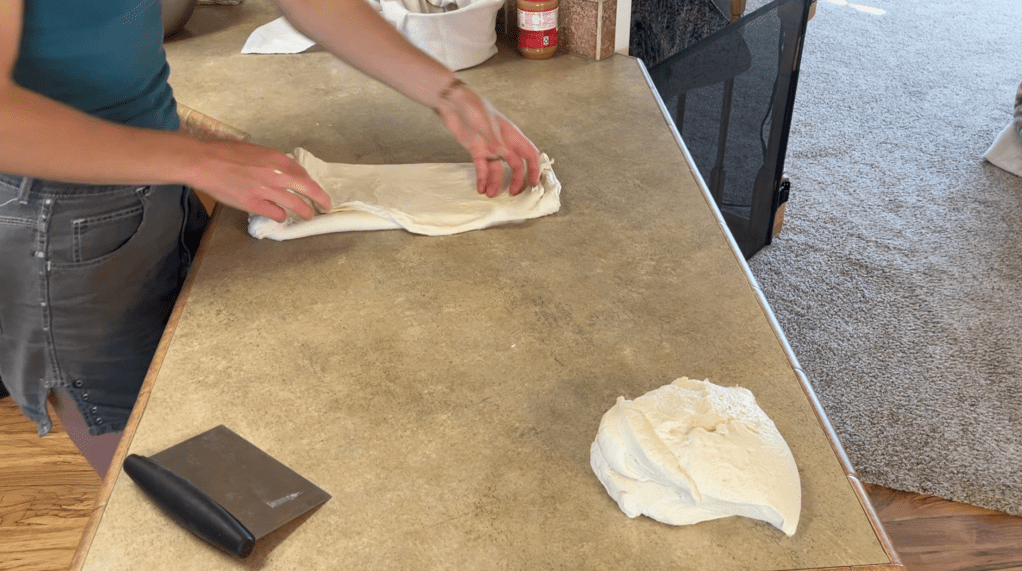
Gently roll the dough before folding the ends down and building tension in the loaf. To build tension, use a gentle push-and-pull motion. See this video to see the whole shaping process.
Step 7: Proofing the Loaves
Once your loaves have been shaped place them into a floured banneton. If you do not have a banneton, a small mixing bowl or basket with a floured tea towel will work just fine.
Place the loaves into the refrigerator for at least 2 hours. I have left loaves in the refrigerator to proof for as long as 2 days and could have left them longer. The important thing to know about leaving loaves in the refrigerator for a longer period of time is that they will become more sour.
Step 8: Preheating
After your loaves have been proofing in the refrigerator for at least an hour and it is 30-60 minutes before you want to bake the loaves, preheat your oven to 475°F with your Dutch ovens in the oven.
I like to add a cookie sheet to the rack below the Dutch ovens to keep the bottom of the loaves from becoming too dark.
Step 9: Scoring the Loaves
When your oven has preheated for 30-60 minutes, set up your counter for scoring the loaves.
If you have bread mats, set them out and turn the bread onto them. If you don’t have bread mats, use a piece of parchment paper instead. Be sure that you make the parchment large enough that you will be able to grab it to lower and raise the loaves to and from the Dutch ovens.
Using a bread lame, sharp knife, or new razor blade; score each loaf. Be sure to score the loaf deeply. I find a Gerber to work great!

The tool you use doesn’t matter as much as the sharpness of the tool. You want to use a very sharp lame, knife, or razor to prevent pulling which will result in a jagged score.
Step 10: Baking the Loaves
Once your loaves are scored, place 4-6 ice cubes in a small bowl. Remove your preheated Dutch ovens from the preheated oven and place the loaves inside, adding 2-3 ice cubes to each Dutch oven to the side of the bread mat or parchment paper before returning the lids to the Dutch ovens and placing them back in the oven for 20 minutes.
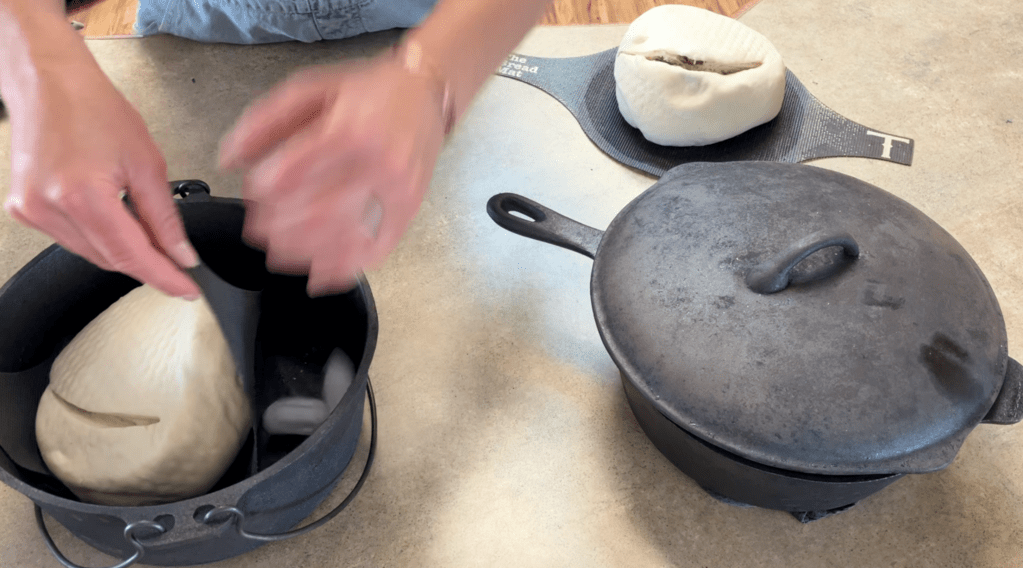
If you are using parchment paper, it is possible that any parchment paper that is outside the Dutch ovens will burn and be brittle, so make sure to tuck the excess into the Dutch oven to protect it.
Adding the ice cubes creates steam and lowers the temperature, allowing the bread to rise as much as possible before a crust begins to form.
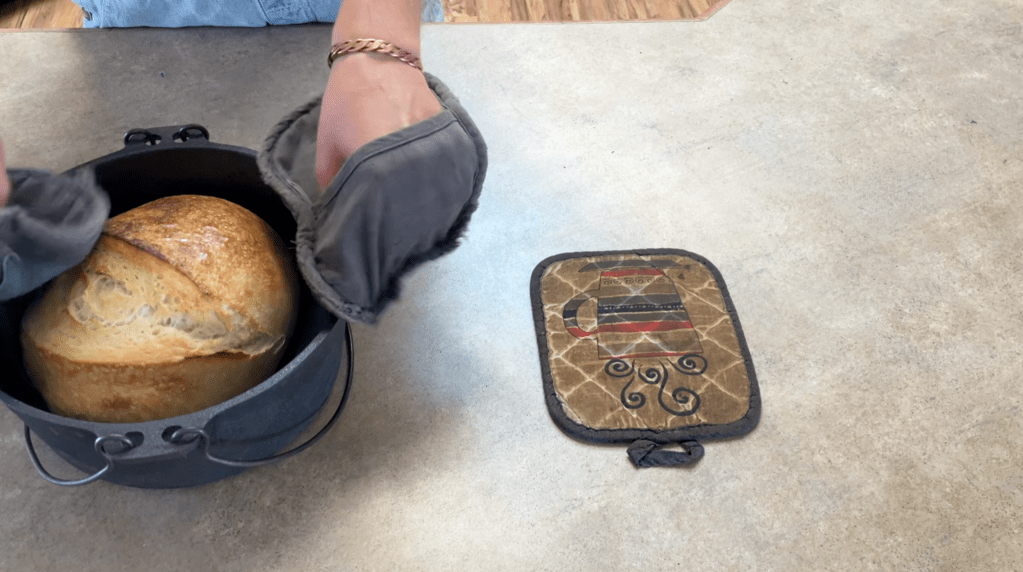
After 20 minutes, remove the lids from the Dutch ovens and bake the loaves for an additional 20 minutes.
Step 11: Cooling the Loaves
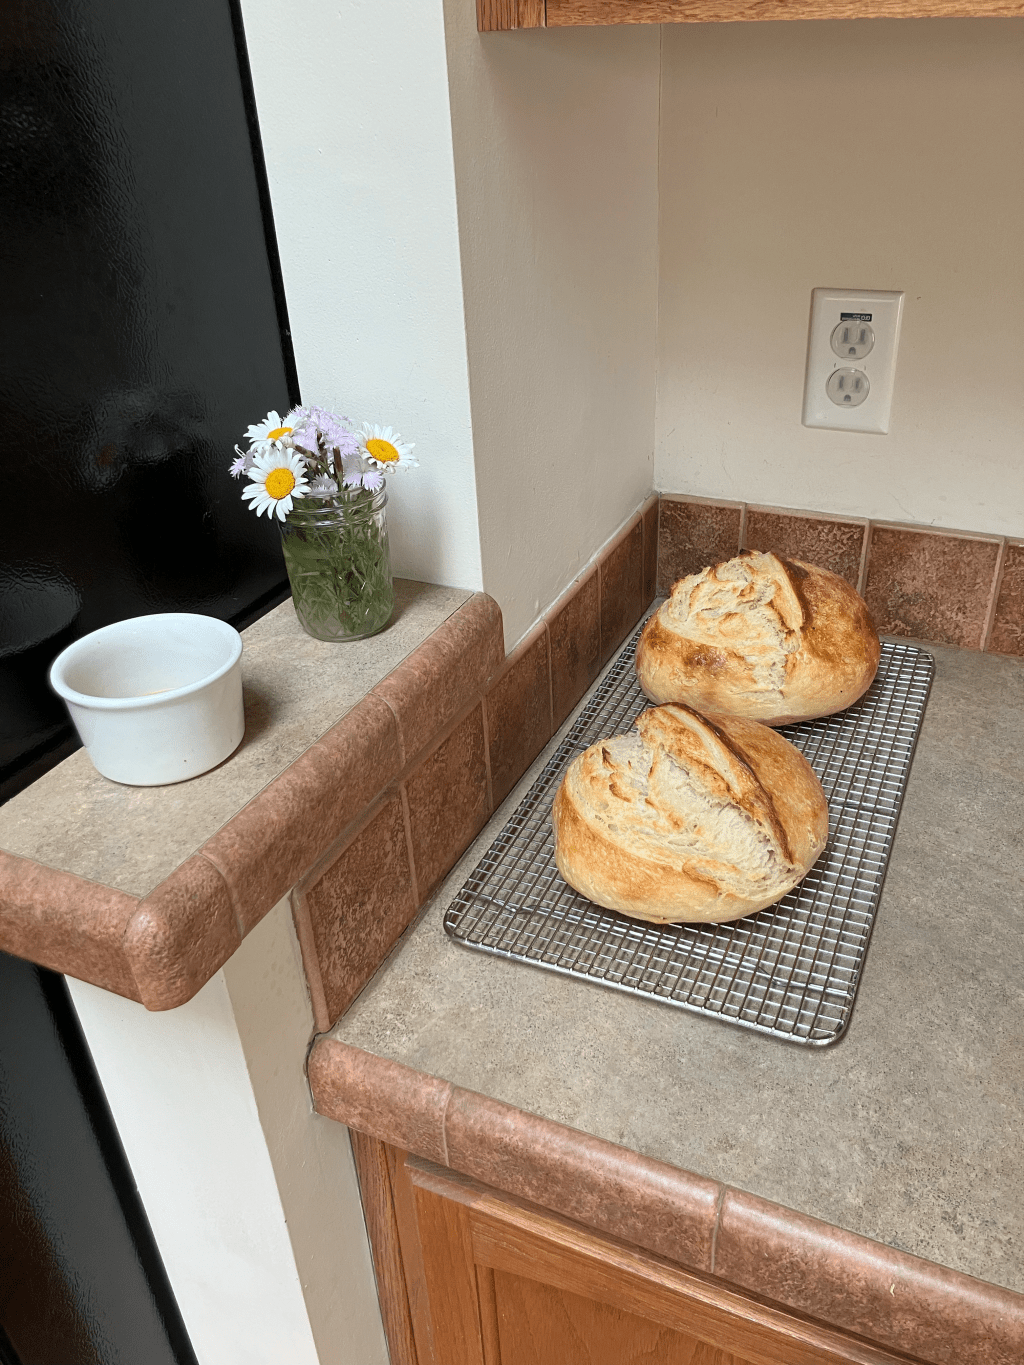
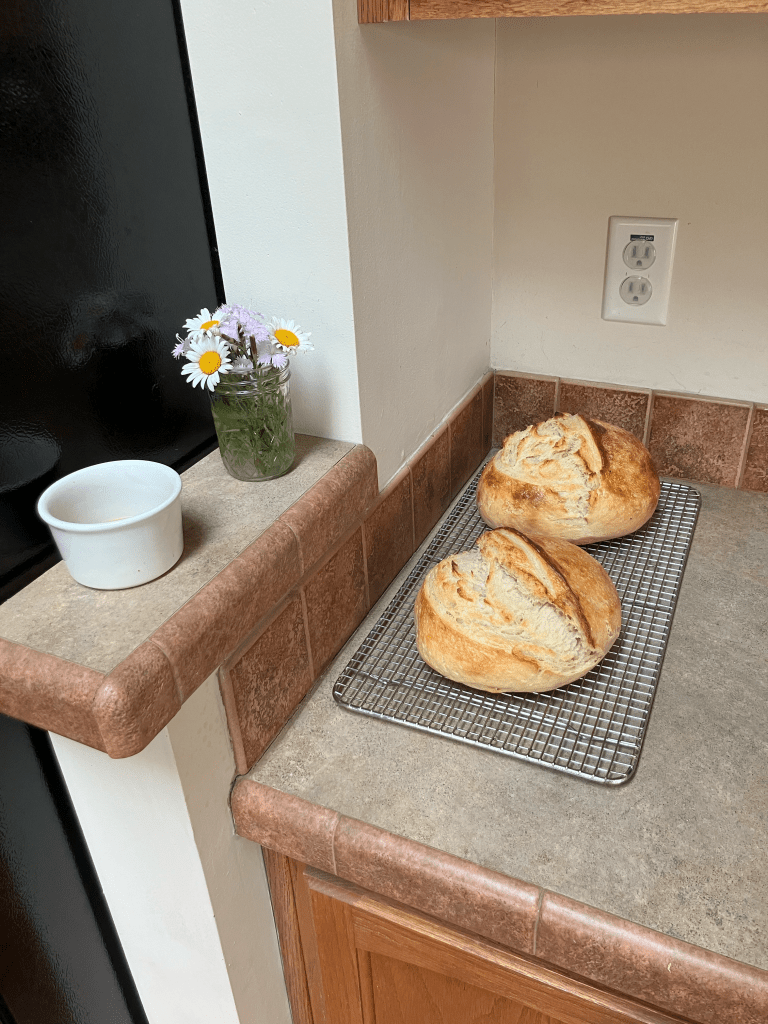
When the second round of 20 minutes has passed, remove the loaves from the Dutch ovens and place on a cooling rack until cooled completely before packaging.
Step 12: Storing the Bread
Store the bread on the counter for 5-7 days; however, it will be freshest for the first 3 days.
You can store your loaves in the refrigerator; however, this will cause them to dry out faster. I find that I can store loaves in the refrigerator for a longer period of time, but that it is best for toast if it has been stored in the refrigerator.
You can also freeze the loaves for up to 3 months. I find that it is best to allow the bread to cool completely before packaging it up in a bread bag followed by a freezer Ziploc bag.
Troubleshooting Common Sourdough Issues
Dense Loaf
If your bread is dense, your starter might not have been active enough. Next time, wait until it’s bubbly and passes the float test (drop a small spoonful in water to test before adding it all to your mixing bowl; it should float). A colder kitchen can also slow fermentation—try placing your dough in a warmer spot, like near a heater or in an oven with the light on, just be sure you don’t forget about it and turn the oven on!
Starter Smells Off and/or Has Liquid on Top
A strong alcohol smell or grayish liquid (hooch) means your starter is hungry. Stir it in, feed it, and let it sit at room temperature until bubbly.
Flat Loaf
Over-proofing can cause a flat loaf. If your dough spreads too much after shaping the loaves, try reducing the bulk fermentation time or proofing in the refrigerator for less time.
Crust Is Too Hard
If the crust is too tough, reduce the baking time in the uncovered Dutch oven by 2–3 minutes or wrap the loaf in a tea towel while cooling to help soften the crust.
Add Inclusions for a New Flavor
You can add inclusions for a more versatile loaf during the shaping process.
Some of my favorites are jalapeno with smoked cheddar and cinnamon with or without raisins. Other inclusion ideas include sun-dried tomatoes with mozzarella, white chocolate with almonds, honey butter with cinnamon, and lemon with blueberry.
To add these inclusions, sprinkle or spread them before each step of the shaping process.
When adding inclusions, sometimes this can affect the baking time of the loaf and require a longer bake both covered and uncovered. The internal temperature of the loaf should be between 205-210°F.
Sample Baking Schedules
Sourdough is flexible enough to fit your life. Below are three schedules tailored to different lifestyles, but feel free to tweak them based on your routine. The key is to work around your starter’s activity and your available time.
Working Full-Time Outside the Home
Evening Day 1: Remove starter from the refrigerator.
Morning Day 2: Feed starter.
Evening Day 2: Mix dough and bulk ferment overnight.
Morning Day 3: Shape loaves and place in refrigerator to proof.
Evening Day 3: Bake loaves.
Working Full-Time Outside the Home Alternative
Morning Day 1: Remove starter from the refrigerator.
Evening Day 1: Feed starter.
Morning Day 2: Mix dough and bulk ferment during the day.
Evening Day 2: Shape loaves, place in refrigerator to proof, and bake loaves.
Staying Home
Morning Day 1: Remove starter from the refrigerator.
Noon Day 1: Feed starter.
Evening Day 1: Mix dough and bulk ferment overnight.
Morning Day 2: Shape loaves and place in refrigerator to proof.
Noon Day 2: Bake loaves.
Sourdough doesn’t have to be intimidating—it’s all about finding a rhythm that works for you. Grab your starter, clear a little counter space, and give this recipe a try. I’d love to hear how it goes! Drop a comment below sharing how your loaf turns out. Happy baking!
Watch a “how to” video here!

Leave a reply to 10 Must-Buy Bulk Pantry Items: Easy Storage Hacks to Bless Your Future Self – Cora's Cottage Cancel reply