
Welcome to the cozy world of home canning! I believe preserving your own food is like capturing summer in a jar. If you’re new to canning, some terms might sound like a foreign language, but don’t worry—I’ll break them down in a simple and friendly way.
This is just the guide I needed when I first started preserving my own food and found myself constantly googling terms from recipes that I didn’t know. Below, you’ll find a one-stop shop of definitions for 30 essential canning terms to help you start your preserving journey with confidence. Let’s dive in!
Water Bath Canning
This is a simple method for preserving high-acid foods like fruits, jams, and pickles. To water bath can, simply fill jars with food, add lids and rings, and submerge them in a big pot of boiling water to kill bacteria and create a vacuum seal. It’s perfect for beginners because it’s straightforward and uses basic equipment that you might already have in your kitchen!

Pressure Canning
Pressure canning is for low-acid foods like vegetables, meats, or beans. This method uses a special pot called a pressure canner that heats jars to a higher temperature than boiling water to safely preserve foods that could spoil otherwise. It’s a bit more advanced but so rewarding! There are two types of pressure canners: a weighted gauge and dial gauge.

If you are interested in the differences between water bath canning and pressure canning, check out this blog where I broke them both down!
Weighted Gauge
Another type of pressure regulator, this one jiggles or rocks to release steam and maintain the right pressure in a pressure canner. It’s simpler than a dial gauge and makes a satisfying sound when it’s working.
Dial Gauge
Found on some pressure canners, a dial gauge shows the pressure inside the canner. You’ll need to watch it closely and adjust the heat to keep the pressure steady. It’s like the heartbeat of your canner! A dial gauge pressure canner is what I like to use when pressuring canning!

Vent
In pressure canning, venting means letting steam escape from the canner for a set time (usually 10 minutes) before sealing it to build pressure. It ensures the right conditions for safe processing.
Open Kettle Canning
This older method involves pouring hot food into hot jars and sealing them with a hot lid without further processing. It is important that your jar, product, and lid are all hot for this method so that a vacuum seal is created as everything cools.
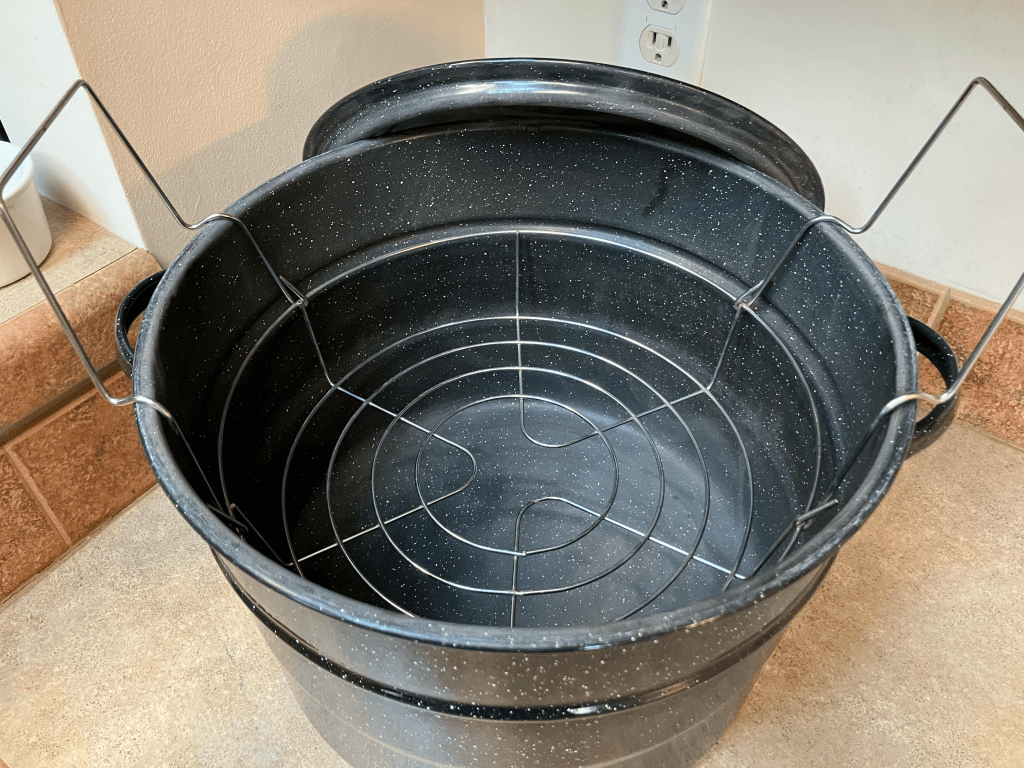
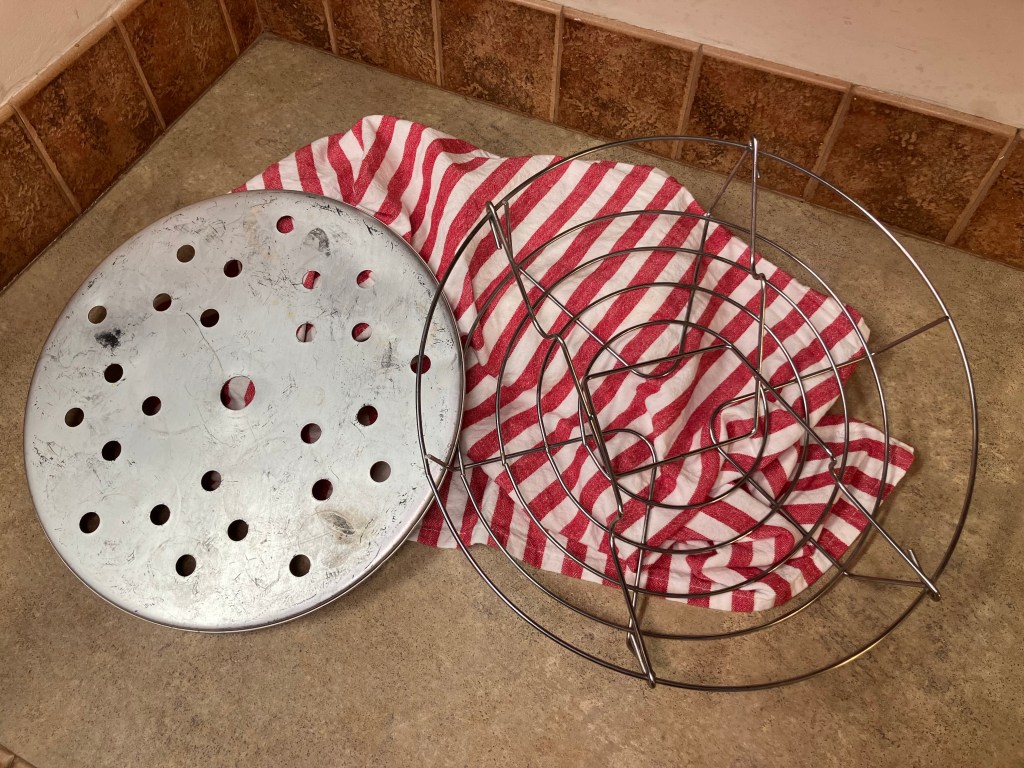
Canning Rack
A canning rack is a metal insert that sits in your canner to keep jars off the bottom of the pot. It ensures water or steam circulates evenly around the jars, preventing cracking and ensuring proper heating. There are different styles of canning racks for water bath canners and pressure canners, but they both serve the same function. Think of it as a cozy cradle for your jars!
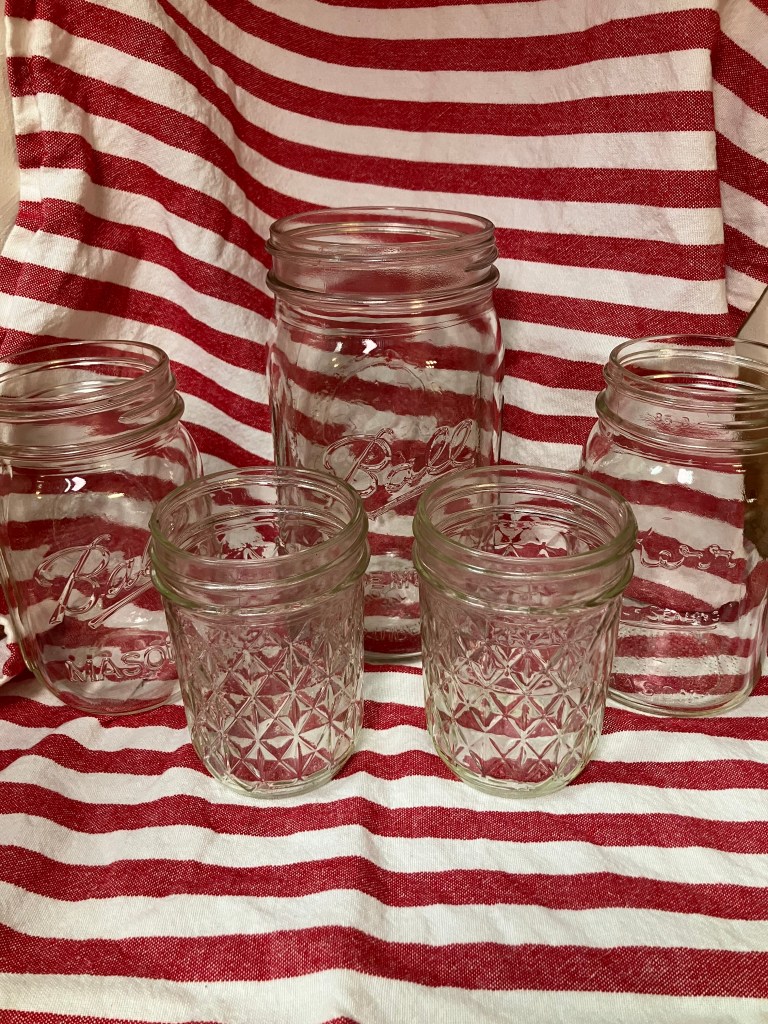
Quart, Pint, Jelly Jars
These are the glass jars you’ll use for canning, sized to fit different needs. Quart jars (32 oz) are great for big batches like soups, pint jars (16 oz) work for smaller portions like sauces, and jelly jars (4-8 oz) are perfect for jams and jellies. There are lots of different brands out there, some common ones include Ball, Kerr, and For Jars. They’re reusable and oh-so-charming!
Head Space
Head space is the empty space left at the top of a jar after filling it with food. It’s usually ¼ to 1 inch, depending on the recipe, and allows food to expand during processing while forming a tight seal. Too much or too little can cause problems, so measure carefully! There are tools to help you measure the headspace. My favorite are these canning funnels with a built-in headspace tool from For Jars!
Canning Lid
These are the flat metal lids with a rubbery sealing compound that go on top of your jars. They create an airtight seal when heated, keeping your food safe. Each lid is single-use for canning, so stock up before you start! These are my favorite canning lids!
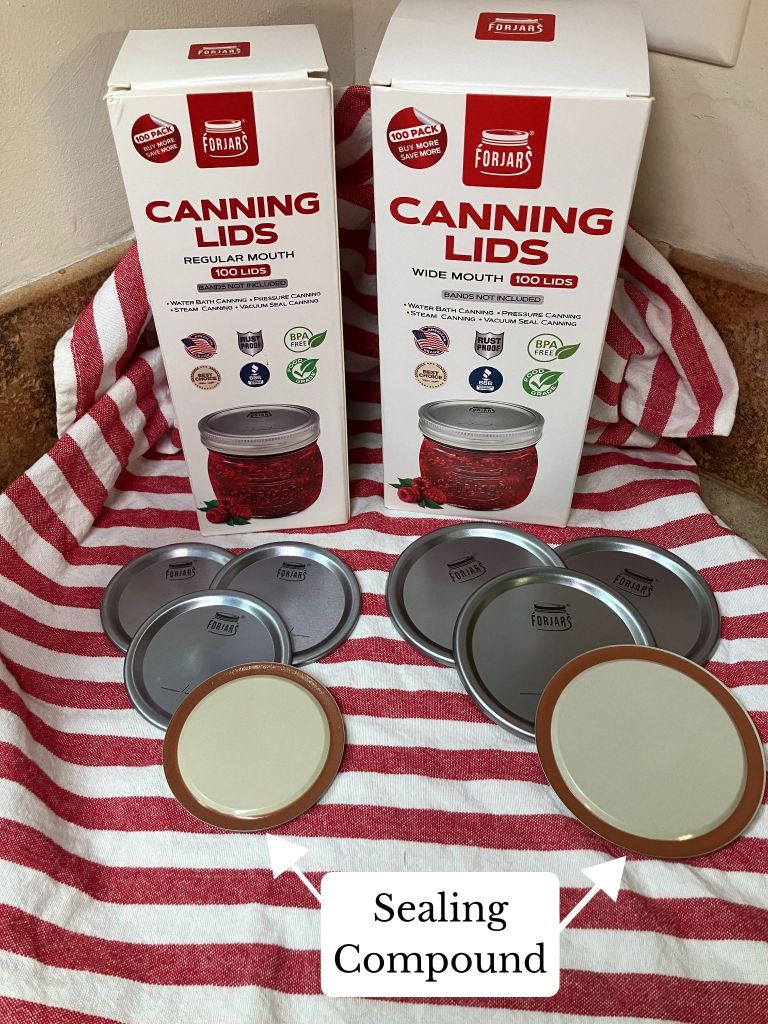
Sealing Compound
The red or rubbery ring on the underside of a canning lid that softens during processing to create an airtight seal. It’s what keeps your food safe and fresh for months!
Jar Band
Also called a screw band, this is the metal ring that screws onto the jar to hold the canning lid in place during processing. You tighten it “finger tight” and can reuse it as long as it’s not rusty or bent. These often come on the jars, or you can get them when you buy new lids.
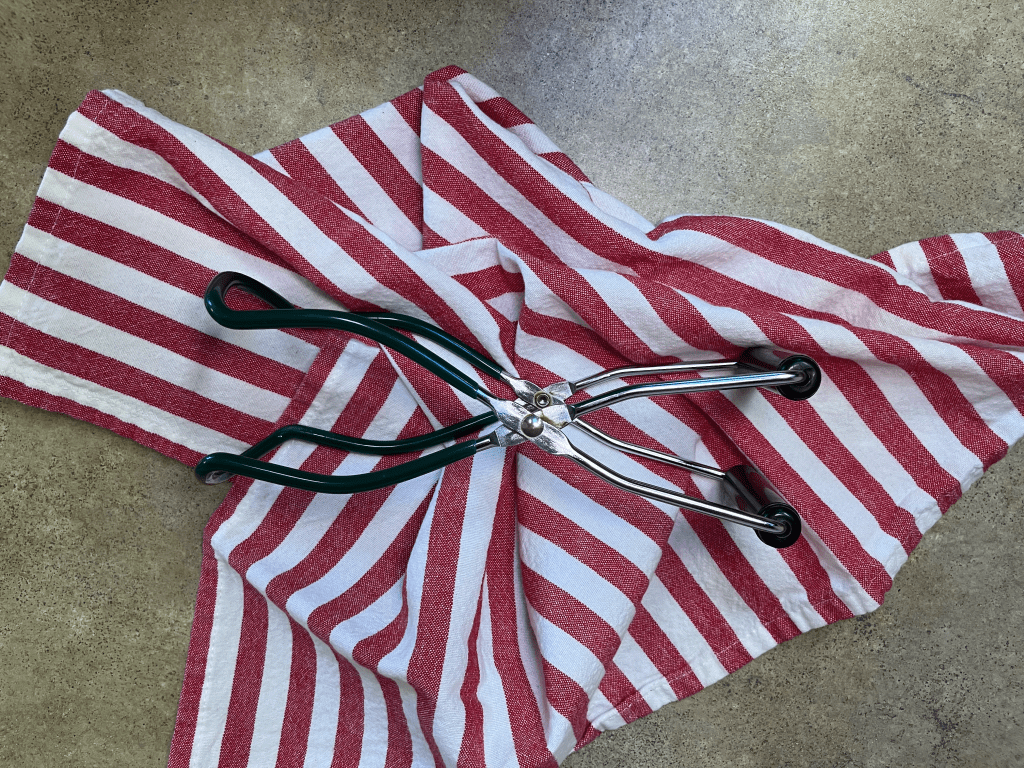
Jar Lifter
A jar lifter is a specially designed tool with rubber-coated tongs shaped to safely lift hot jars in and out of boiling water or a pressure canner. It keeps your hands safe and makes you feel like a canning pro!
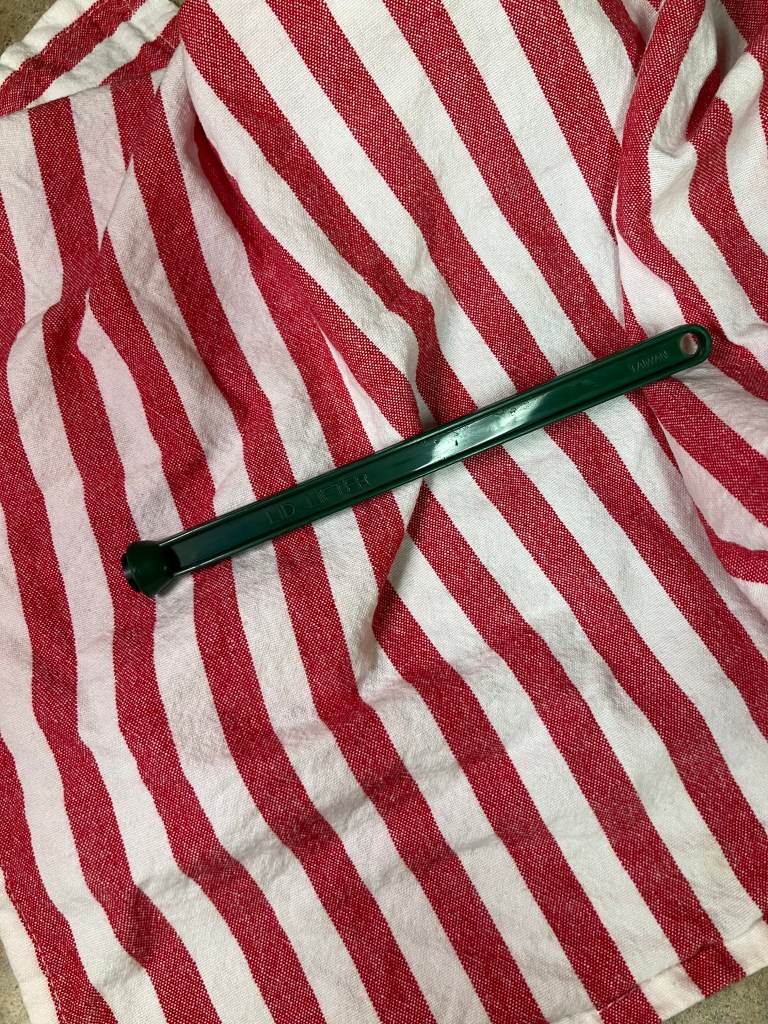
Bubble Remover
This little tool (often plastic or wooden) helps you remove air bubbles from filled jars before sealing. You slide it along the inside of the jar to release trapped air, ensuring a proper seal and safe preservation. If you don’t have one, something like a wooden skewer will work great!
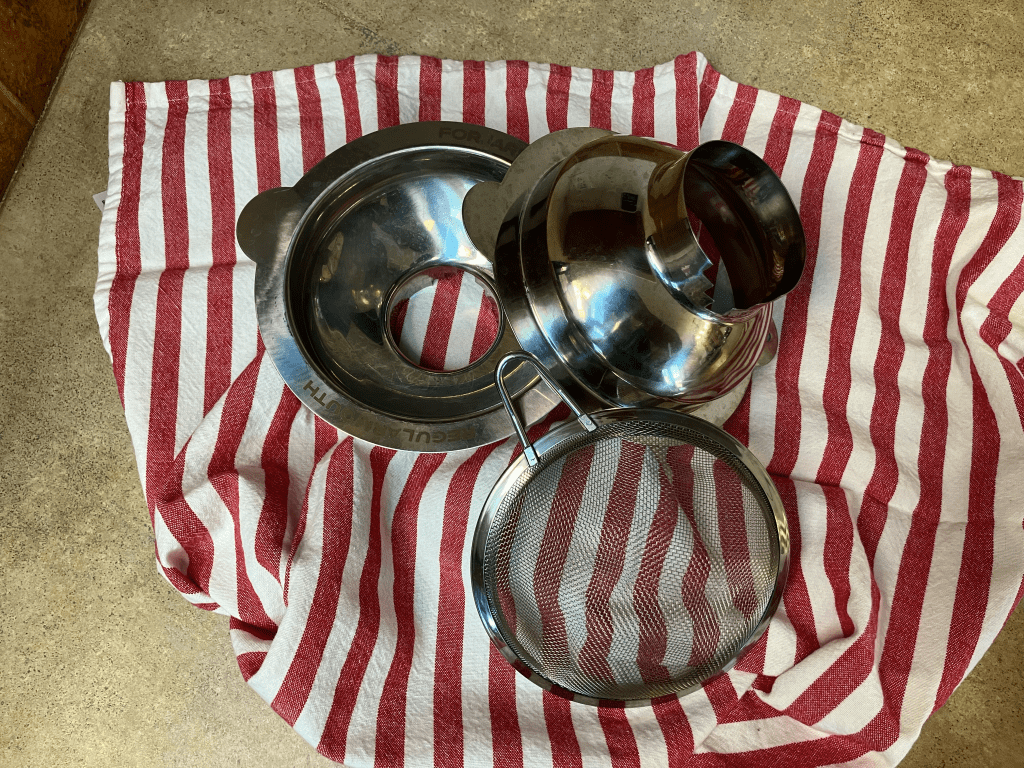
Canning Funnel
A wide-mouthed funnel that fits perfectly into canning jars, making it easy to pour in foods like jams or soups without spilling. It keeps things tidy and ensures your jar rims stay clean for a good seal. I love this set from For Jars that has a small mouth and wide mouth funnel with built-in headspace measurements.
Processing Time
Processing time is how long you heat your filled jars in a water bath or pressure canner to kill bacteria and seal them properly. Recipes will tell you the exact time, and it’s crucial to follow it to keep your food safe. Often times recipes will have a conversion that needs to be made based on your altitude.
Altitude Adjustment
If you live high above sea level, you’ll need to adjust your processing time or pressure because water boils at a lower temperature at higher altitudes. Check your recipe or a canning guide to get it just right! Many canning books will have a conversion chart or the instruction manual of a pressure canner.
Hot Pack
Hot packing means cooking or heating your food before putting it into jars. It helps food fit better, reduces air bubbles, and can improve flavor and texture. It’s common for things like applesauce or tomatoes.
Raw Pack
Raw packing is when you fill jars with uncooked food, then cover it with hot liquid (like syrup or brine) before processing. It’s simpler but works best for certain foods like peaches or pickles.
Canning Salt
This is pure, non-iodized salt used in canning to avoid cloudiness or discoloration in your preserves. It’s perfect for pickles and other recipes where clarity matters. Any salt that is non-iodized will work just like a dedicated canning salt. My favorite is Redmond Real Salt.
Acidification
This is the process of adding lemon juice, vinegar, or citric acid to low-acid foods (like tomatoes) to make them safe for water bath canning. It lowers the pH to prevent bacterial growth.
Pickling
Pickling means preserving food in a vinegar or brine solution, often with spices, to create tangy treats like dill pickles or pickled beets. It’s a fun, beginner-friendly way to start canning.
Pectin
A natural ingredient used in jams and jellies to help them thicken and set into that perfect spreadable texture. It’s like magic for creating homemade preserves!
Vacuum Seal
When your jars cool after processing, the lid pulls down tightly, creating a vacuum seal. You’ll hear a satisfying “pop” as it seals, and the lid will curve slightly inward, showing it’s safe to store.
High-Acid Food
Foods with a pH of 4.6 or lower, like fruits, tomatoes, and pickles, are safe for water bath canning. These are great for beginners because they’re easier to preserve safely.
Low-Acid Food
Foods with a pH above 4.6, like vegetables, meats, or beans, need pressure canning to reach high enough temperatures to kill harmful bacteria. These require extra care but are worth the time and effort!
Lid Lifter
A small tool, often magnetic, used to pick up hot canning lids from simmering water and place them on jars. It keeps your fingers safe and makes the process smooth and easy.
Finger Tight
This means tightening jar bands just until you feel resistance, using only your fingertips. It’s tight enough to hold the lid but loose enough to let air escape during processing for a good seal.
Cooling Period
After processing, jars need to sit undisturbed for 12-24 hours to cool and form a vacuum seal. Keep them on a towel in a draft-free spot, and resist the urge to poke the lids!
Seal Check
After cooling, you can check if jars sealed properly by pressing the lid’s center (it shouldn’t pop up) or looking for a concave shape. This ensures your food is safely preserved.
These terms are your roadmap to preserving deliciousness. Start with a simple jam or pickle recipe, and you’ll be filling your pantry with homemade goodness in no time. Are there terms you have come across that aren’t included? Drop them below in the comments, and I will add them to the list! Happy canning!

Leave a comment