
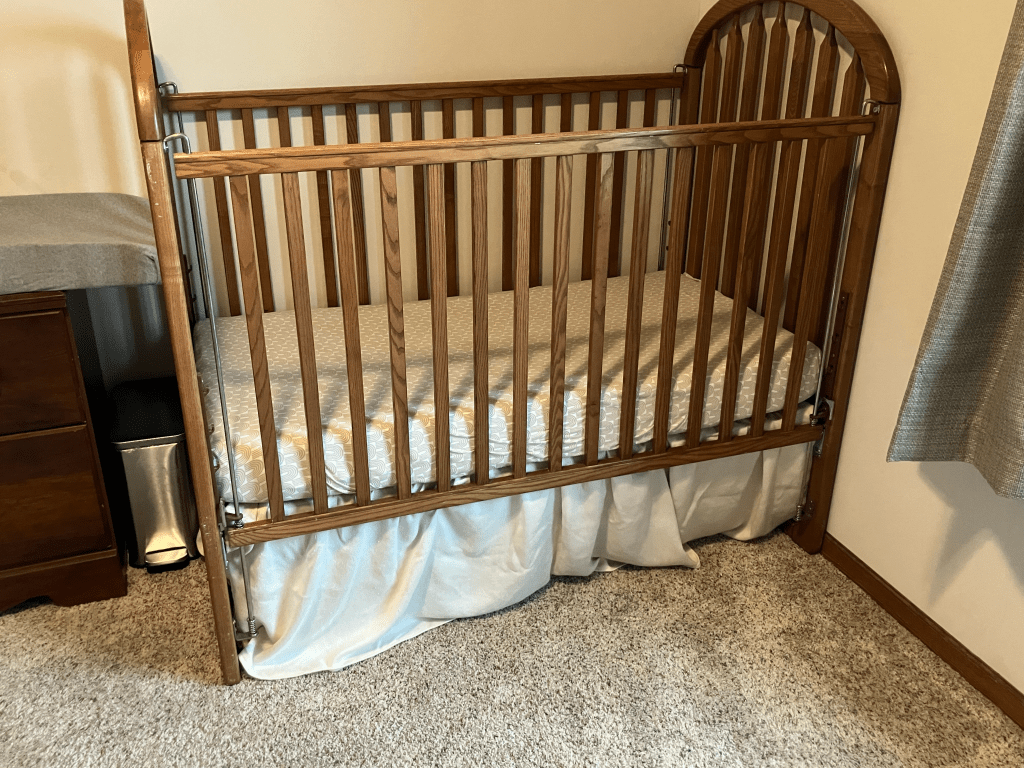
The space under a crib can be great for extra storage of things like wipes, diapers, or the next size of clothes; however, all those things aren’t the most aesthetic.
What if you could utilize all the storage capability beneath the crib, but you also didn’t have to look at the boxes and totes?
This isn’t fantasy, it is really possible with a crib skirt!
I was tired of looking at the boxes of extra diapers and wipes, the pack ‘n play, and extra vacuum seal bags of baby and toddler clothes that we store under the crib. My daughters room looked put together and peaceful except for the clutter that seemed to stick out like a sore thumb from under the crib.
After finally finding some old curtains, I was a able to make a custom crib skirt to fit my daughter’s crib that hides all the odds and ends that are tucked away underneath. The perfect win-win solution to keep the storage but not have to see it all!
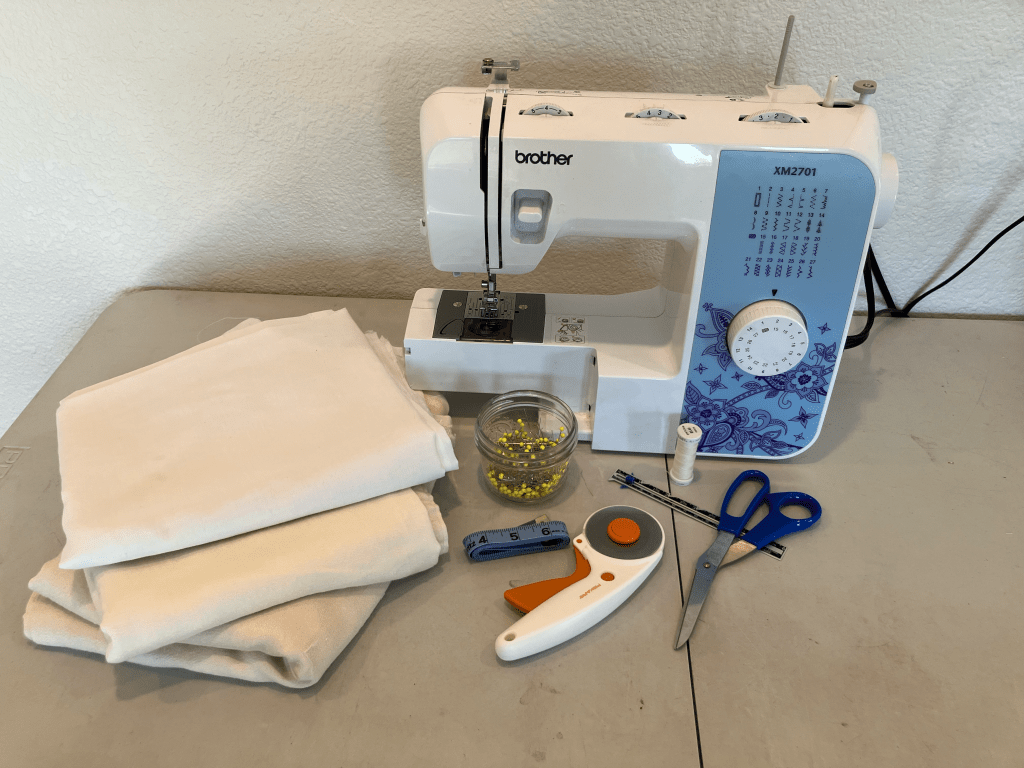
Supplies for Making a DIY Crib Skirt
For a DIY crib skirt you will need:
- Fabric: The amount of fabric you will need will vary slighted depending on the crib. I used two curtain panels from some old curtains that were 44″ by 74″ each. I also used a “base piece” to help hold the crib skirt in place when changing the crib sheets. This piece came from the lining of the same curtains.
- Coordinating Thread: For this project, I used an off-white thread, but any color that matches or coordinates with your fabric of choice will work great.
- Sewing Machine: I just have a basic Brother sewing machine like this one. This project does not require any fancy computerized machine as it is all straight stitches and gathering. You could even do it by hand if you didn’t have a sewing machine, it would just take longer.
- Yard Stick/Measure Tape: I find a yard stick to be easier than a measure tape, but one of these is needed to get your fabric cut down to the proper size with straight edges.
- Scissors/Rotary Wheel: I prefer to use the rotary wheel for making longer cuts, but I use scissors when making shorter cuts or trimming my excess thread tails.
- Pins: Pins help to hold the fabric in place as you placing hems, or attaching the various pieces of the bed skirt together.
Cut List for Making a DIY Crib Skirt
To make a custom crib skirt you will need:
- Base Piece: This piece is optional, but I find it much easier to change out the crib sheets without having to completely readjust the crib skirt when there is a base piece to help hold the skirt in place. You will want to measure your crib, but I cut this base piece to be 28″ by 54″ which allowed me an inch of seam allowance.
- Short Skirt Panels: To cover the short ends of the crib, you will need 2 pieces of fabric cut for length and height. For our crib these pieces measured 22″ by 37″ without hems or gathering.
- Long Skirt Panels: These panels will cover the long edges of the crib and for our crib these measured 22″ by 74″ without hems or gathering.
The measurements used to make the crib skirt might vary depending on your crib. The length and width of the crib should be the same if you have a standard crib, but the height that is needed to reach from the crib to the floor might vary. This can even vary depending on the setting that the crib is on, so it is best to measure from both the highest and lowest setting before determining how much height will be needed for the crib skirt.
Step-By-Step Guide to Making a DIY Crib Skirt
Follow these steps to make a DIY custom crib skirt. Our crib measures 52″ by 28″ and the mattress can be set between 14″ and 23″ off the ground.
Step 1: Measure the Crib
- Measure the Length and Width: A standard crib is 52″ by 28″ but it is still a good idea to measure before cutting any fabric.
- Measure the Height: Many cribs allow the mattress to be raised or lowered, so it is important to measure both the highest and lowest setting.
- Add Extra for Hems and Gathering: Remember to add an extra inch (at least) for hems. If you are going to use a single fold 1/2 inch hem, a 1″ allowance should be enough. To allow a flowy and light look to the crib skirt, be sure to add some extra length so that you can add gathers. For this project, I added an extra 22″ to the long panel and an extra 9″ to the short panel. The more length you add the bigger the gathers, and less length you add the smaller the gathers.
- Double Check Measurements: Double check all your measurements before cutting any fabric. Make sure that any seam allowance and gathering needed has been accounted for and added to the length and width.
Step 2: Cut the Fabric
- Lay Out the Fabric: Lay the fabric out on a large, flat surface such as the floor or a large table.
- Mark Out the Measurements: Measure out where cuts will need to be made and mark them boldly so that you can easily see where to cut your fabric. You can use a fabric marker or pencil, but my favorite tool for this are these FriXion erasable pens by Pilot because they wash out easily and are very easy to see on fabric.
- Cut the Panels: Cut your custom crib skirt panels using scissors or a rotary cutter. If you chose to use a rotary cutter, be sure you have a cutting mat beneath your fabric. When cutting make sure your fabric is laid out evenly so that you get straight edges. Be sure to cut your base panel as well.
Step 3: Add Your Hems
- Fold the Edge: To add a hem, start by folding the rough edges up 1/2″ towards the wrong side of the fabric. Pin this fold in place and/or press with an iron.
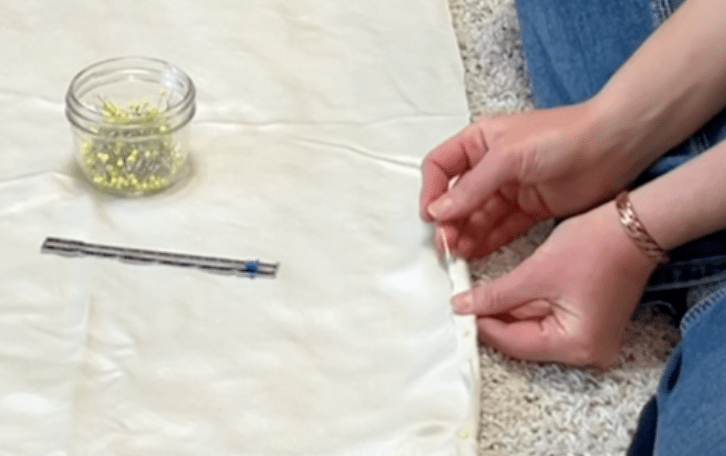
- Add a Stitch: Run a single stitch to hold the hem in place. Make sure to back stitch at both the beginning and end.

- Repeat for All Edges: Repeat the process on all four sides of each panel (2 long skirt panels, 2 short skirt panels, and the base piece).
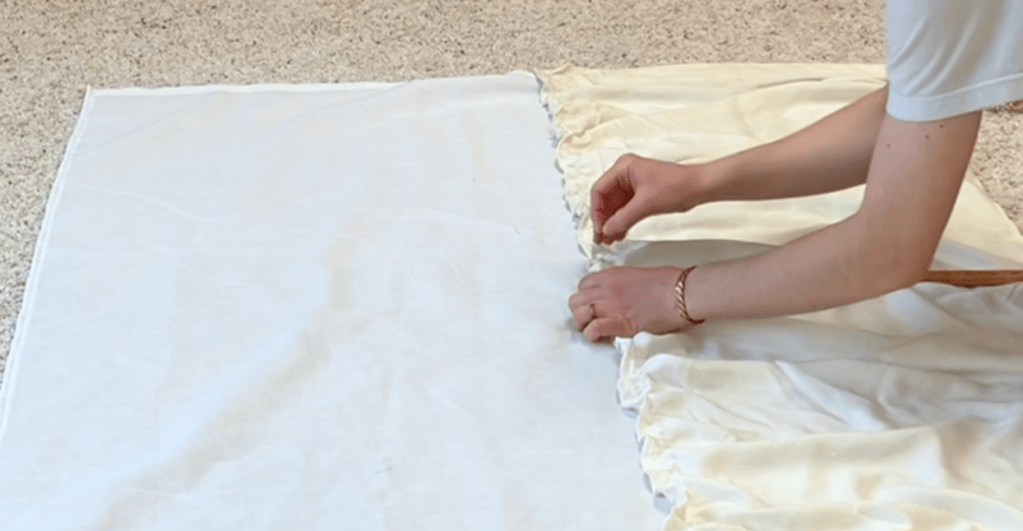
Step 4: Add Gathers
- Change Out Machine Foot: Change out the sewing machine foot to a gather foot.
- Add the Gathering: Take the first long skirt panel and add a gather on the top edge. Make sure that you do NOT back stitch at the beginning or end and that there is plenty of extra thread. I like to line up the edge of the gather foot with the seam of the hem. This helps to keep the gather straight.

- Repeat the Gathering Process: Repeat the gathering process for the other 3 skirt panels (1 long and 2 short).
If you do not have a gather foot, this video shows how to add a gather with a basic sewing machine foot.
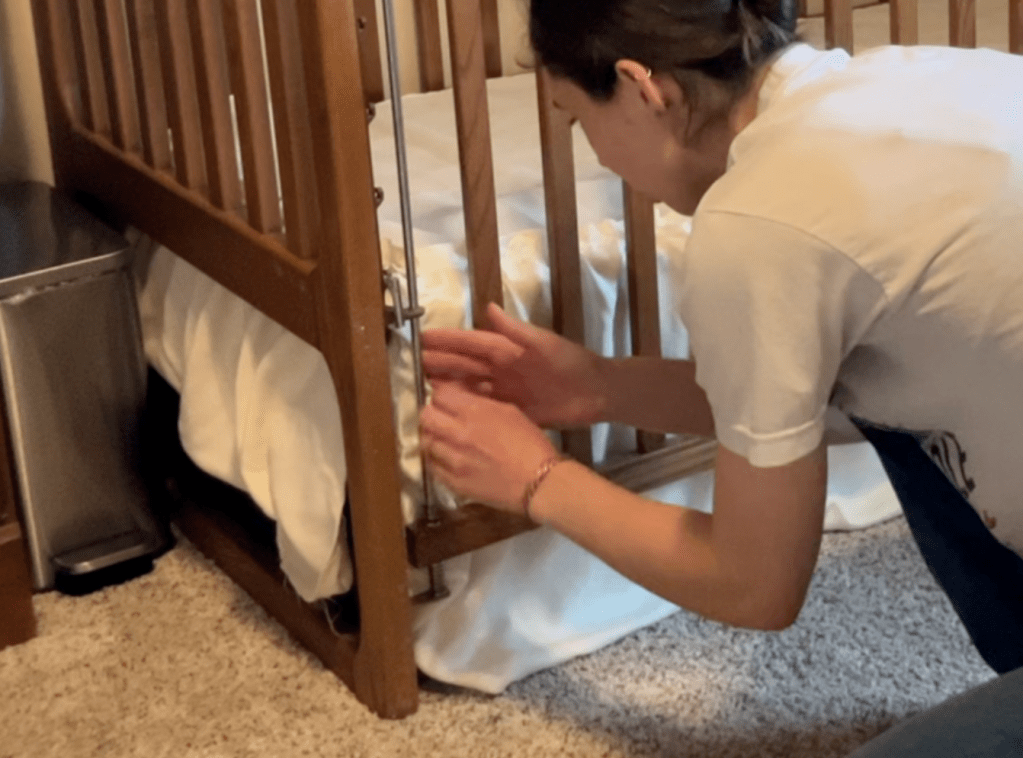
Step 5: Attach Skirt Panels to the Base Panel
- Lay Out the Bed Skirt Pieces: Lay out the base piece in the middle of a large, flat area. Around each side of the base piece, lay out the skirt panels with the gathered edge on the base piece.

- Adjust Gathers: The gathers might be too tight or two loose for the base piece. To adjust the gathers, gently work the fabric along the bottom thread, pushing the fabric for tighter gathers and pulling the fabric for looser gathers. Be sure to make these adjustments gently as the thread can break if this is done too aggressively.
- Attach the Panels: When the gathers are adjusted, pin the panels to the base piece using pins.
- Stitch the Panels: Add a single stitch to attach the skirt panels and hold them in place. Be sure to back stitch at the beginning and the end.
- Repeat for Remaining Panels: Repeat adjusting the gathers, attaching the panels, and stitching them in place for the remaining 3 panels.
Step 6: Install the DIY Bed Skirt
- Remove the Mattress: Remove the crib mattress from the crib.
- Install Bed Skirt: Place the bed skirt into the crib and feed the panels through so that they hang down to the floor.
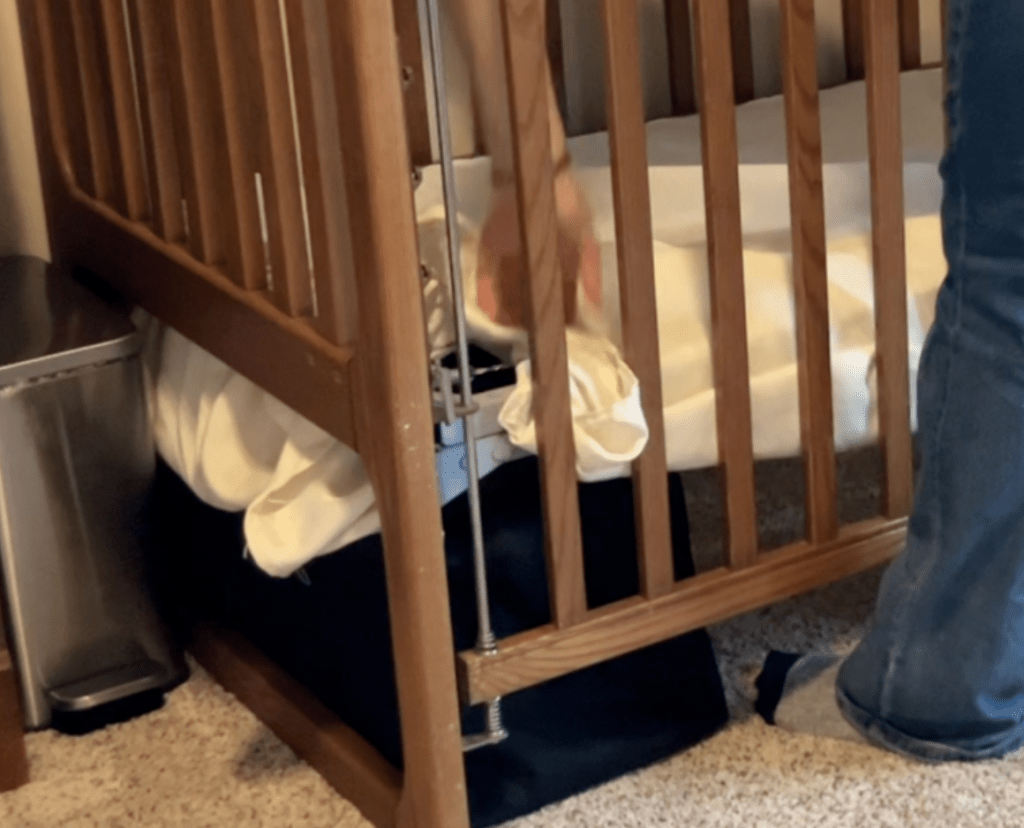
- Adjust the Bed Skirt: Adjust the panels so that they hang evenly to the floor without catching and so that they meet in the corners.
- Replace the Crib Mattress: Return the crib mattress before making any final adjustments to the custom crib skirt.
Troubleshooting Common Issues
Here are some common problems you might encounter and how to fix them:
- Uneven Hems: If your hems look wavy, double-check that your folds are even before stitching. Pressing with an iron can help.
- Fabric Puckers When Sewing: Use pins to hold the fabric in place, and sew slowly to avoid puckering.
Tips for the Best DIY Custom Crib Skirt
- Choose the Right Fabric: Lightweight, flowy fabrics like cotton or polyester blends work best for a soft drape.
- Test Your Measurements: Hang a piece of scrap fabric to test the length and width before cutting your final skirt panels.
- Experiment with Patterns: Stripes or subtle patterns can add visual interest without overwhelming the room.
FAQs When Making a DIY Crib Skirt
How much fabric do I need for a standard crib?
This will vary somewhat depending on how wide the bolt of fabric is and how much distance is between the floor and mattress of the crib at the highest setting, but you will need approximately 3 yards of fabric. However, it is always best to measure your crib and do the math to make sure you have enough fabric.
Can I make a custom crib skirt without a sewing machine?
Yes, you can hand-sew the crib skirt, though a sewing machine is faster.
Have you tried making a custom crib skirt? Share your results in the comments below or pin this tutorial to your DIY Pinterest board!

Leave a comment