
Disclosure: This post contains affiliate links and I may earn a small commission at no additional cost to you when you use a link.
Main sources for this blog include:
– The Encyclopedia of County Living by Carla Emery
– The Self-Sufficient Life and How to Live It by John Seymour

Okra is not a nightshade, but I am including it in this nightshade plant series because it grows so similarly to nightshades. Okra is a part of the cotton family which includes things like lettuce, sweet corn, rhubarb, and mushrooms. Native to Egypt and Ethiopia where it grows wild, okra is an annual and grows well during hot, sunny summers. Cloudy summers will not produce a good okra crop, but if tomatoes reliably crop, you can likely get a good okra crop as well. Light, fertile soil with a pH of 6 to 7 and occasional watering that does not swamp the plants is best. Plants can grow anywhere from 2 to 9 feet tall with blooms that are yellow and red.
When planting okra, it is best if the soil temperature is at least 60°F and temperatures are warm. Okra do best when sheltered from the wind, but they need full sun. Seeds should be planted 1/2 to 1 inch deep after they have been soaked in tepid water for several hours. Seeds that have not been soaked will take a very long time to germinate and sprout. Plant seeds 3 inches apart and thin later if needed. Okra is planted so close together because it has a poor germination rate, but will need to be thinned to 12 to 20 inches apart. Rows should be spaced 30 inches apart, or if planting a dwarf variety they can be closer together. Be careful when plants are young not to till deeply or mess with the root system. Instead, carefully weed until they have grown large enough to shade the ground below and prevent weeds from growing.
Okra is a self-fertile, insect-pollinated plant. Several nutrients are needed for okra to thrive, but nitrogen, potassium, and phosphorus are most important. Other trace nutrients that are needed include boron, iron, manganese, and zinc. The amount and type of fertilizer that should be applied to the soil will differ depending on the makeup of the soil in which you are planting. There are soil tests that can be used to help determine how much, if any, of each nutrient needs to be applied. As a general rule of thumb, nitrogen, potassium, and phosphorus can be applied lightly which come in many fertilizer mixes.
Okra has a variety of diseases and pests that can affect it’s growth. Diseases include fusarium wilt, powdery mildew, yellow vine mosaic virus, and enation leaf curl, among various others. Fusarium wilt will start with wilting of the plant and will progressively get worse, leading to yellowing of the plant and drooping. Over time the plant will die, though there are some sprays that can help reverse the effects if the disease is caught early enough. To help prevent fusarium wilt, use a crop rotation strategy.
Powdery mildew will present with white spots on the leaves and if left untreated can lead to the entire leaf being covered as well as other parts of the plant. Older foliage is more susceptible compared to younger foliage and the mildew is light and powdery so it cab blow from one plant to another. Overhead watering can help to wash the fungus that produces the mildew off of the leaves, but good nutrition for the plants and soil is the best option to prevent powdery mildew as healthy plants are less susceptible.
Yellow vein mosaic virus is spread by white flies and is the most destructive disease in okra. It can infect the plant at all stages of growth and will affect both growth and yield. Yellow vein mosaic virus presents with yellowing of the veins followed by yellowing of the leaf in later stages of the virus. To help prevent the virus, control the white fly population and plant resistant varieties.
Enation leaf curl is also spread by white flies and is recognized by its pinhead sized enations on the bottom of the leaf. Over time these enations become warty and rough, and the leaf size diminishes. Additionally, twisting of the stem and branches will occur making the plant appear to be crawling along the ground. If any fruit are produced they will be few, small, and deformed. Remove the infected plants and destroy, but to prevent the disease the best option is to control the white fly population.
Pests include aphids, armyworms, spider mites, and various others. Aphids will be found on the underside of leaves and on the stems of the plant. They will cause yellowing and curling of leaves. Aphids can be controlled by removing the infected foliage if it is only a small amount, planting tolerant varieties, or spraying the plants with neem oil or insecticidal soaps. Armyworms will leave circular holes in the leaves, wounds on the fruit, and large numbers of larvae can skeletonize the leaves. Eggs can be recognized by the white, cottony appearance of the clusters. To control armyworms organically, you can use natural enemies of armyworms or spray Bacillus thuringiensis. Though there are some chemicals on the market, many of the ones available to home gardeners are not effective at controlling armyworms. Another pest is spider mites which can be recognized by yellowing leaves that are covered in webbing. Plants that are water stressed are more susceptible, so keeping plants adequately watered is important. There are some insecticidal soaps that can be sprayed on the plant if the spider mite population becomes large.
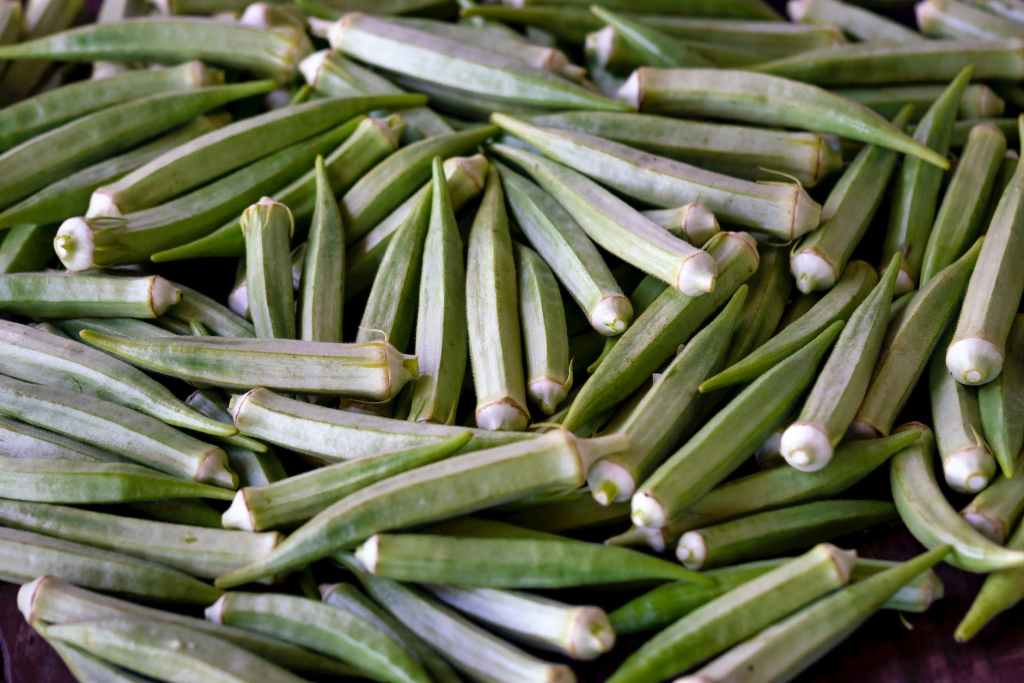
After planting, okra pods can be harvested in as little as 50-60 days. The pods will set on the plant after lots of blooms appear, and some varieties can begin setting on pods when they are only a foot tall. Okra are somewhat sensitive to weather and climate so severely hot, dry weather, poor drainage, or drastic changes in the weather can cause the buds to drop instead of producing pods. Pods should be harvested when they are 2 to 3 1/2 inches long because longer pods will begin to mature getting a tough, woody texture and bitter taste. Pods grow quickly so it is a good idea to pick pods every other day at least, not only to keep the pods from becoming overly mature but also to help the plant continue to produce new pods. When harvesting okra, it is best to cut the pods off to keep from damaging the plant as pulling and tugging can cause damage to not only the plant but the root system as well. Okra that is harvested regularly will continue to produce pods until there is a frost. There are spines on the leaves of okra that are nearly invisible to the eye, but they can get into your skinning. It is best to wear gloves and long sleeves when harvesting okra to keep the spines from getting into your skin and causing a burning, itching sensation.
If your pods do become overripe before you are able to harvest them, okra seeds remain tender even after the pods have gotten a tough, woody texture and bitter flavor. The seeds can be shelled out of the pods and cooked like peas. The tough, woody okra can still be used in soups by adding in it in and boiling. The soft part of the pods will cook into the soup, flavoring it and adding nutrients while the woody part of the pod can be removed from the soup and discarded before serving.
Okra, like many garden vegetables can be used fresh or preserved by canning, drying, or freezing. Fresh picked okra will only a keep a day or two before it begins to get tough and woody like okra left on the plant, so it is best to use it quickly or preserve it if it will not be used right away. Freezing okra works best when you are starting with young tender okra pods. Wash the okra, remove the stems, and steam-blanch the pods whole for 2 to 3 minutes. After the pods come out of the steam-blanch, chill them before freezing. The pods can be left whole or sliced for freezing. One of my favorite ways to eat okra is fried, but it can also be preserved when it is half-fried so that it is a quick addition to a meal. To freeze half-fried okra, prepare the okra as you would to fry by washing, removing the stem, slicing, and seasoning in a bag with cornmeal and other spices. Then, fry the okra but only about half way before cooling and packaging it to freeze. When you are ready to use the half-fried okra in a meal, thaw it and finish frying it in a skillet, or bake in the oven until tender.
To dry okra, it can be hung or placed in a dehydrator. Drying okra by hanging does take patience and a place that is shady, but has good airflow. Wash, remove the stem, and slice before placing the slices unto a string. After the okra a dry, it is a good practice to heat them a little more in the oven to be sure they are dry all the way through. To use a dehydrator, prepare the okra the same way as for hang drying but place them single layer on a drying rack before adding them to your dehydrator. They should be sliced thinly, only 1/4 thick and dried for 12 hours at 120°F. When they are dried all the way through they will be brittle. When you are ready to use dried okra, add 1 cup of okra to 2 cups of boiling water.
Okra are a relatively nutritious garden vegetable that is an amazing source of vitamins K1 and C. In fact, 1 cup of okra contains about 26% of the daily value of both vitamins. Other nutrients found in okra include magnesium, folate(vitamin B6), and vitamin A. Several antioxidants can be found in okra, but the main one is polyphenols. This particular antioxidant is linked to improved heart and brain health. While more studies are needed, some studies suggest that okra may help to lower the risk of heart disease, may lower blood sugar, and may have anticancer properties. Okra may also be beneficial to pregnant women because it contains folate an important nutrient that can aid in the development of the baby’s brain and spine.
While okra is a less common vegetable, it is a good one to add to your garden rotation! Between its beautiful blooms and nutritious fruit, it is a great option to add some variety to both your garden and your kitchen.

Leave a comment